Your First UI
Choose the Backend you want to follow.
Important
The file with the full, discussed code will be at the very end of each section.
Backends
Prerequisites
Python v3.10+coshuipackagepygamedependency
If you haven't met these requirements, please go here.
Basic Boilerplate
To start us off, let's make the Pygame boilerplate that we'll use for this tutorial. If you're following along, make sure to copy this boilerplate into your file.
Do note that all UI related code that we will be working on will be within the highlighted line.
import pygame as py
import coshui as cui

WIDTH, HEIGHT = 800, 800
FPS = 60

def main():
    py.init()
    screen = py.display.set_mode((WIDTH, HEIGHT))
    py.display.set_caption("Pygame CoshUI Test")
    clock = py.time.Clock()

    running = True
    while running:
        for event in py.event.get():
            if event.type == py.QUIT:
                running = False

        screen.fill((0, 0, 0))

        # CoshUI Code Here

        py.display.flip()
        clock.tick(FPS)

    py.quit()

if __name__ == "__main__":
    main()
Setting Up CoshUIRenderer
Let us move on to the "body" of CoshUI. CoshUIRenderer() is the "entry point" of the CoshUI engine, UI syntax will not work properly without it. To set it up, you must do this:
Highlight in Boilerplate
Remember to put this code within the highlighted part of the boilerplate.
All UI code runs within this context manager (with block). It registers all CoshUI nodes, determines their order of rendering, and gives you the ability to animate and interact with them for free.
Immediate and Retained Hybrid
A note to keep in mind is that CoshUI is inherently an "immediate mode" UI library, meaning it rebuilds every Node per frame. It gets away with signals and animations because it has an internal reconciliation layer that saves and sets state per frame.
Before we move on, I'd like to discuss the parameters If set to ▸CoshUIRenderer Parameters
CoshUIRenderer() takes. It takes a CoshBackend instance for its first parameter and a CoshMode instance for its second. CoshBackend is easy to deduce, it's the backend that we pass based on what rendering pipeline we're using, but CoshMode might be a little confusing.CoshMode is defaulted to NORMAL, which makes it run normally. But one thing you can do is set it to DEBUG:
DEBUG, it will open up a tkinter window that lets you see the entire UI structure and click individual Nodes to see their properties for that frame (similar to DevTools on a browser). This is helpful for whenever need to check values for each Node. 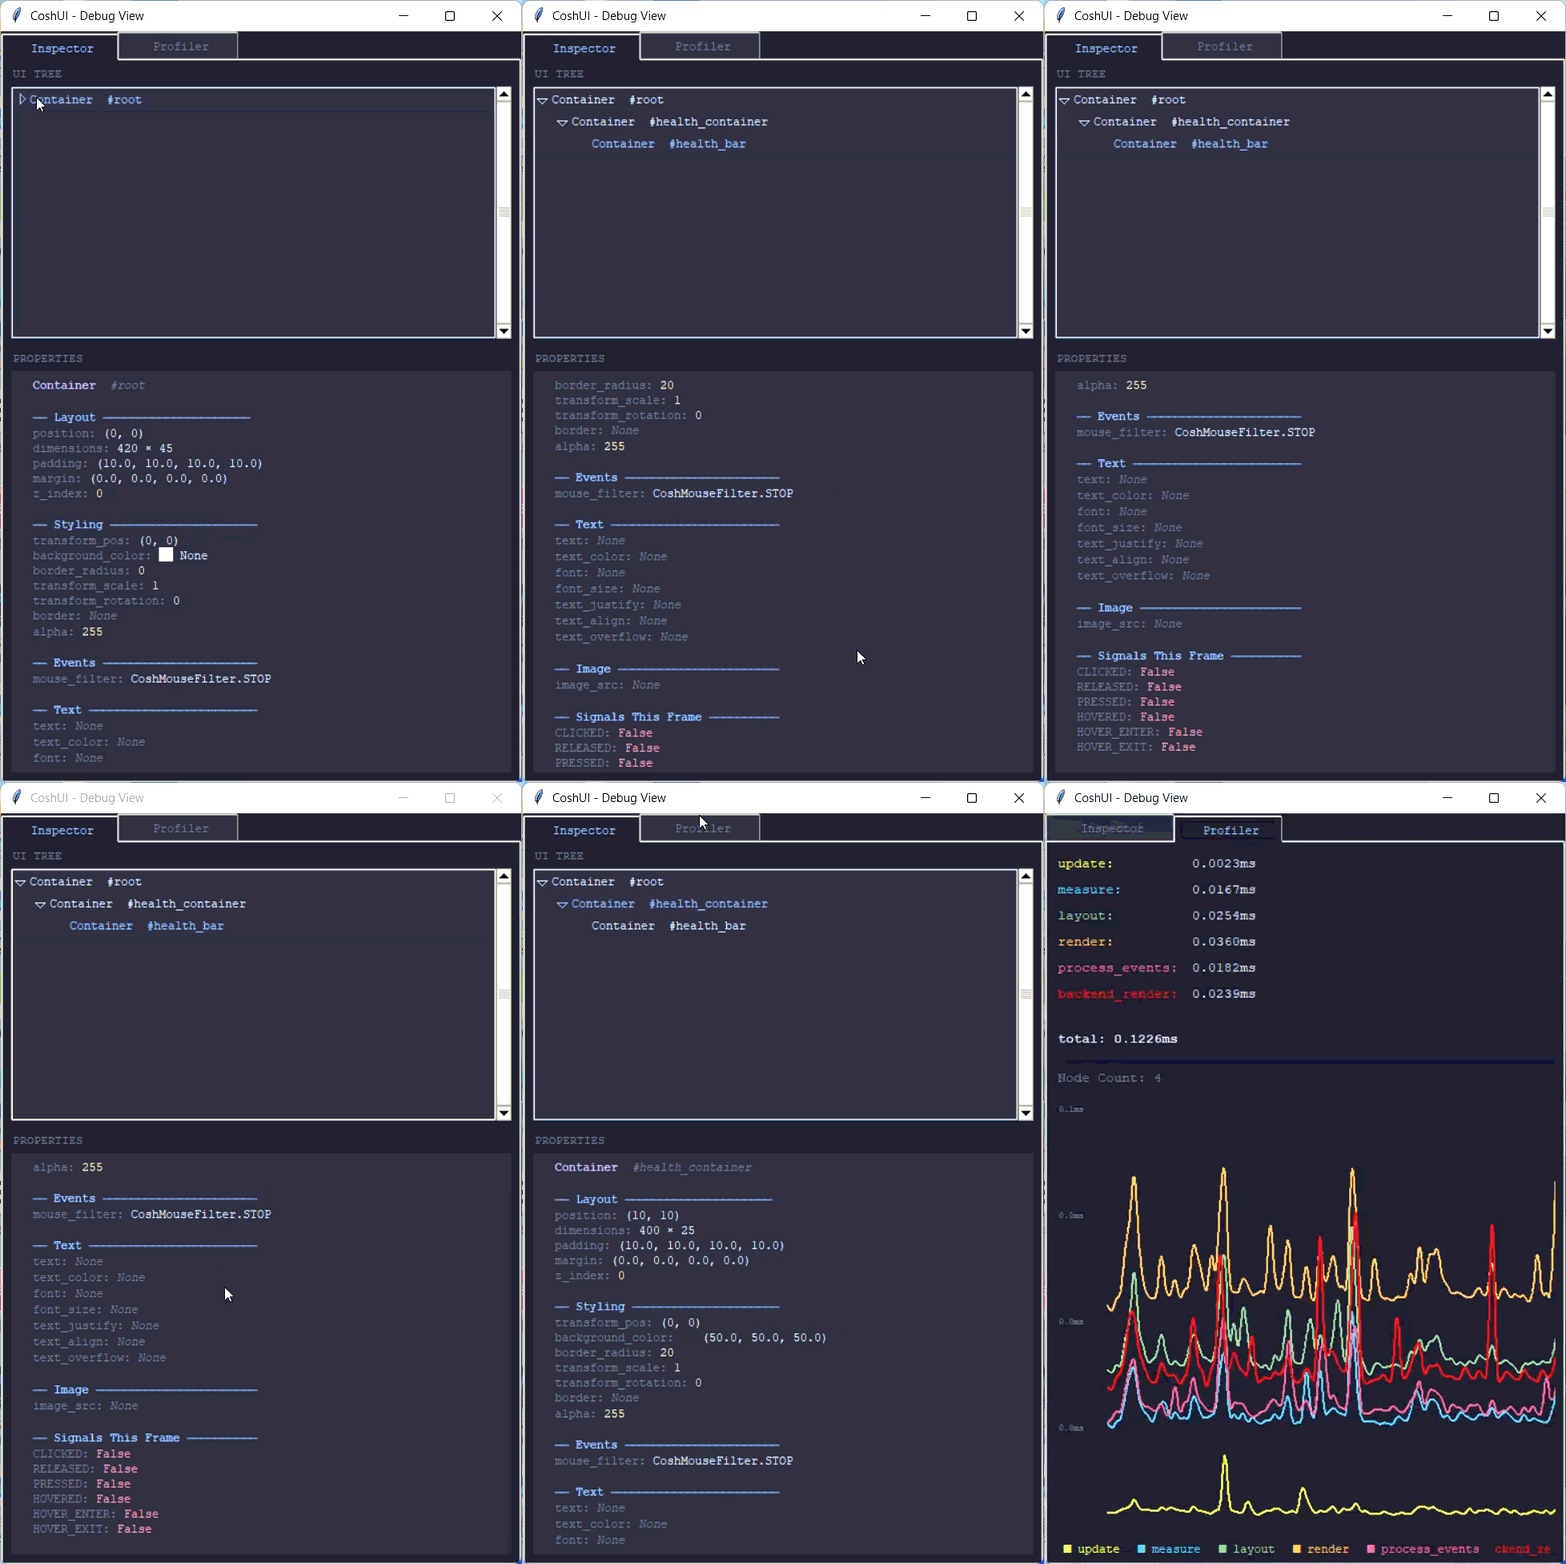
Declaring Your First Element
Learning new UI libraries can be scary because of the new API you have to learn, but CoshUI is built to be easy to pick up without much resistance when building or migrating the UI. If you have experience with HTML then this might seem very familiar, if you don't then that's completely okay. Let's create our first Container as a Node instead of a Parent. Here's how that works:
with cui.CoshUIRenderer(cui.PygameBackend(screen)):
    cui.Container(id="root_container", width=100, height=100)
If you've added that to your code and ran it, you might be confused as to why nothing is showing, well no need to worry about that for now, your Container is currently invisible because it has no color. We'll get into styling in the next section.
Back to our example above, that Container instance creates a box that is 100x100 in size on the top-left of the screen. An interesting part about Containers is that they can actually act as context managers that take in children like this:
with cui.CoshUIRenderer(cui.PygameBackend(screen)):
    with cui.Container(id="root_container", width=100, height=100):
        cui.Container(id="child_container", width=50, height=50)
Container within the root_container that is 50x50 in size.
Node Types
From this, there might be some people thinking CoshUI is all about Containers, but the Container is one of many Nodes/Widgets in CoshUI. We'll get to the others soon.
Styling Your First Element
In other UI libraries, styling is mostly an afterthought. In CoshUI, styling is a primary part of the experience. To style a Node, you need to utilize CoshUI's CoshStyling object. It holds the properties that each Node needs to be visually distinct.
So let's first add a color to our Container. To set it, you can do this:
with cui.CoshUIRenderer(cui.PygameBackend(screen)):
    cui.Container(
        id="root_container",
        width=100, height=100,
        style=cui.CoshStyling(background_color=(100, 100, 255))
    )
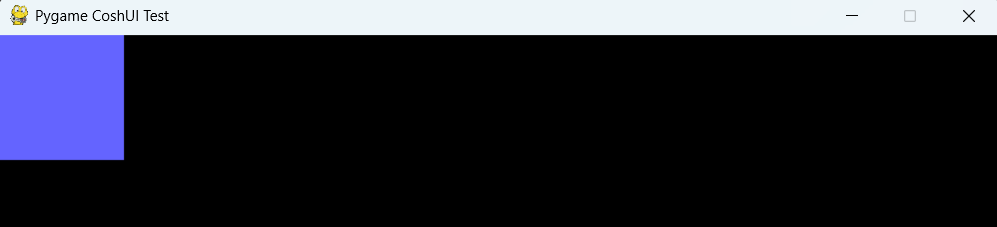
Container at the top-left of your window.
The Background Color is almost a no-brainer. Its main purpose is to declare the color of the Node. It can be set like this: Alpha is also — again — a no-brainer. It determines the transparency of a Node. It can be set like this: You may notice, background color lets you set the alpha within it. Not to worry though, if the Border sets an outline around a Node. It can be set like this: Border radius determines the roundness of a Node's corner. You can either set all corners or each individual corner like this: CoshUI has "transform" properties. Basically properties that only affect rendering, not layout. The first is The next one is The last one is To learn more about styling, check the Styling section in the API. ▸CoshStyling Parameters
CoshStyling object is what determines the visual identity of a Node. It offers a few parameters that let you change the entire look of a Node.Background Color and Alpha
background_color=(R, G, B) or background_color=(R, G, B, A).alpha=0-255.alpha field is set when the alpha value is set in background_color, the alpha field takes priority.Border
border=((R, G, B), weight) or border=(R, G, B, weight)Border Radius
border_radius=20 or border_radius=(top-left, top-right, bottom-right, bottom-left)Transforms
transform_position, which lets you offset the node relative to its position. Basically (0, 50) means it moves 50 pixels downward from its current position. It can be set like this: transform_position=(x, y)transform_scale, which changes the scale of a Node with the default being 1.0. It can be set like this: transform_scale=2.0 which makes the Node 2x bigger relative to its center.transform_rotation, which rotates the Node based counter-clockwise on the passed degree. It can be set like this: transform_rotation=45.0 which tilts the node 45 degrees counter-clockwise.
If you've noticed, styling can be somewhat tedious, especially if it's the same styles applied to multiple Nodes. To make it easier, CoshUI has a class system that you can utilize to apply the same styles to many Nodes without re-declaring the same with that, you can now pass in that style to a Node by passing it through the The cool thing about classes is that you can pass in multiple classes at the same time, so if you declare multiple classes with different styling for each, the Node will take in all of it like this: You can pass multiple classes like this where you just add in a space to the string, but if your class name itself has a space (for some reason), it's better to pass it through a list like this: Class Ordering A question appears with multiple classes, what styles get added if there are conflicting styles? In CoshUI, the classes that are added later in the Example:
If you want to learn more about reusable styling, check out the Classes section in the API.▸Reusable Styling Through Classes
CoshStyling object. To use it you have to declare the class and the CoshStyling object before the main while loop like this:# This is called BEFORE the while loop.
cui.add_class(
"example_class",
cui.CoshStyling(background_color=(255, 100, 100), border_radius=10, border=((255, 255, 255), 5))
)
classes field with the string itself (classes="example_class") or a list (classes=["example_class"]). Here's an example:with cui.CoshUIRenderer(cui.PygameBackend(screen)):
cui.Container(
id="root_container",
width=100, height=100,
classes="example_class"
)
# Outside the while loop
cui.add_class(
    "example_class",
    cui.CoshStyling(background_color=(255, 100, 100), border_radius=10, border=((255, 255, 255), 5))
)
cui.add_class(
    "example_class2",
    cui.CoshStyling(alpha=150)
)

# in CoshUIRenderer
with cui.CoshUIRenderer(cui.PygameBackend(screen)):
    cui.Container(
        id="root_container",
        width=100, height=100,
        classes="example_class example_class2"
    )
classes field will override the ones added before. In the example above, if the two classes had conflicting properties, the one added latest will override the ones before. And of course, explicit styling (styles directly added through the style field) takes highest priority.
Layout Fundamentals
Before moving on, let's learn a little bit about the layout properties you can set which gives you maximum control over your UI.
As this is a little much to take on all at once, I've made every part collapsible so it's easier to digest one at a time.
As shown in earlier sections, you can set width and height. These two properties are Universal Properties, meaning they exist and can be set in every Node within CoshUI. They determine the size of your Node based on pixels. Here are the 4 ways to set width and height: To learn more, check out the Width and Height section in the API.▸Width and Height
# Fixed
cui.Container(
    width=100
)
# Fill
cui.Container(
    width=cui.FILL
)
# AUTO
cui.Container(
    width=cui.AUTO
)
# Percentage
cui.Container(
    width=cui.PERCENTAGE(75)
)
Margin is a Universal Property whilst padding is a Local Property and can only be set within To learn more, check out the Padding and Margin section in the API.▸Padding and Margin
ParentNodes (Nodes that can take in children). An example of a ParentNode would be Container. Margin is the property that dictates the space other nodes need to give around that specific Node, while padding dictates the distance the children should be from the edges of that ParentNode. You can set padding and margin like this:
Positioning is a simple toggle in CoshUI. It determines whether a Node will be added to the layout calculations or not. The default is To learn more, check out the Positioning section in the API.▸Positioning
RELATIVE, meaning it will take up space and other Nodes will respect that space, setting it to ABSOLUTE makes it so that Node no longer gets added to layout calculations. Other Nodes will take that Node's space, kind of like it doesn't exist anymore to them. This also opens up the x and y parameters discussed next. Setting positioning is like this:# ABSOLUTE
cui.Container(positioning=cui.ABSOLUTE)
# RELATIVE (This is default so there's no point in setting this)
cui.Container(positioning=cui.RELATIVE)
Position in CoshUI refers to the To learn more, check out the Position section in the API.▸Position
x and y properties, and these are a bit special. It can only be mutated when the positioning parameter is set to ABSOLUTE, if not then adding values to x and y does nothing. What x and y do is directly offsets the position (relative to the parent) of the node layout-wise. To set x and y, you need to first set positioning to ABSOLUTE first, like this:
The As this is a complex topic, it is encouraged to check the Align and Justify section in the API.▸Align and Justify
align and justify properties for CoshUI are Local Properties, they are accessible only through ParentNodes like Container or Grid. They determine the position of that Nodes children within itself. They can be set like this:# Note that these are only accessible through ParentNodes.
cui.Container(align=cui.ALIGN_CENTER, justify=cui.JUSTIFY_CENTER)
# These are the values you can set align and justify to.
align=cui.ALIGN_START
align=cui.ALIGN_CENTER
align=cui.ALIGN_END
justify=cui.JUSTIFY_START
justify=cui.JUSTIFY_CENTER
justify=cui.JUSTIFY_END
justify=cui.JUSTIFY_SPACE_AROUND
justify=cui.JUSTIFY_SPACE_BETWEEN
justify=cui.JUSTIFY_SPACE_EVENLY
The The example above makes it so the children of the ▸Gap
gap property only exists in ParentNodes. It's a simple property, it all it does is determine the gap children will have between each other. Here's how to set it:Container will have a gap of 10 pixels between each other.
The You can set it to both ▸Direction
direction property is a property that only the Container widget possesses, it determines whether children will be placed horizontally or vertically. It's default value is ROW and setting it is simple:ROW and COLUMN, but ROW is default so there's no point in setting it unless you want to be explicit.
Introducing Signals
If you've used other UI frameworks, interaction systems usually use callback systems, which can be rather complex and a bit of a mess to set up. In CoshUI however, you can use what's called a "signal". Every Node will emit one, so if a Node is hovered over it will emit a HOVERED signal, if it is clicked it will emit a CLICKED signal. This comes automatically so users only need to poll those signals to check whether an event has happened to a Node or not, which lets you run your code if it has.
Let's declare a Button() — one of CoshUI's many widgets — and see how it works. Let's also make it so the Container's width and height fill the entire screen, here's how that will work:
with cui.CoshUIRenderer(cui.PygameBackend(screen)):
    with cui.Container(
        id="root_container",
        width=cui.FILL, height=cui.FILL,
        style=cui.CoshStyling(background_color=(100, 100, 255))
    ):
        cui.Button(id="example_button", text="Click to Print")
if statement with the get_signal() function that CoshUI provides:
with cui.CoshUIRenderer(cui.PygameBackend(screen)):
    with cui.Container(
        id="root_container",
        width=cui.FILL, height=cui.FILL,
        style=cui.CoshStyling(background_color=(100, 100, 255))
    ):
        cui.Button(id="example_button", text="Click to Print")

if cui.get_signal("example_button", cui.CLICKED):
    print("Hello World!")
get_signal() takes in 2 parameters, the id of the Node you want to capture signals from and the event you want to poll. Once you click the button, it will now print Hello World! in the terminal.
A nice thing about the signal system is that it works for every Node, not just buttons. If you want to see if a Container was clicked, you can poll it as long as it has an id. It's also additive, meaning if you make a signal on the same Node, it doesn't override others.
Example:
with cui.CoshUIRenderer(cui.PygameBackend(screen)):
    cui.Container(
        id="root_container",
        width=cui.FILL, height=cui.FILL,
        style=cui.CoshStyling(background_color=(100, 100, 255))
    )

if cui.get_signal("root_container", cui.CLICKED):
    print("Hello World!")
In CoshUI, there are ways to customize how a Node receives and consumes interaction events. We can achieve that with the The first value you can set Next value is Last value is ▸Mouse Filters
mouse_filter field which is a Universal Property. mouse_filter to is IGNORE:PASS:STOP:
As you may have already guessed, but there are quite a few interactions that can be passed in to the signal system. Here's what they are: These can be passed to the second parameter of the ▸Different Interactions
# Checks if the node was just clicked.
cui.CLICKED

# Checks if the node was just released from a click event.
cui.RELEASED

# Checks if the node is being clicked that frame.
cui.PRESSED

# Checks if the cursor entered the Node's boundaries.
cui.HOVER_ENTER

# Checks if the cursor exited the Node's boundaries.
cui.HOVER_EXIT

# Checks if the cursor is within the Node's boundaries.
cui.HOVERED
get_signal() function. To learn more, check the Signals section in the API.
Introducing Animations
When using other UI libraries, I'm willing to bet most of them have little to no built-in animation systems. Some may have external libraries that help with animations but for the most part, animations are either fully missing or not even considered a first-class citizen.
CoshUI is different, it has its own animation system built upon the reconciliation structure. You've most probably seen it work in the previous section as the Button() widget has built-in animations.
So let's address how to animate Nodes. CoshUI has an animate() function that takes in 5 parameters, n_property, target_id, end_value, duration, and finally easing. Here's an example of how it works:
if cui.get_signal("example_button", cui.CLICKED):
    cui.animate("transform_position", "example_button", (0, 50), 1.5, "ease_out_bounce")
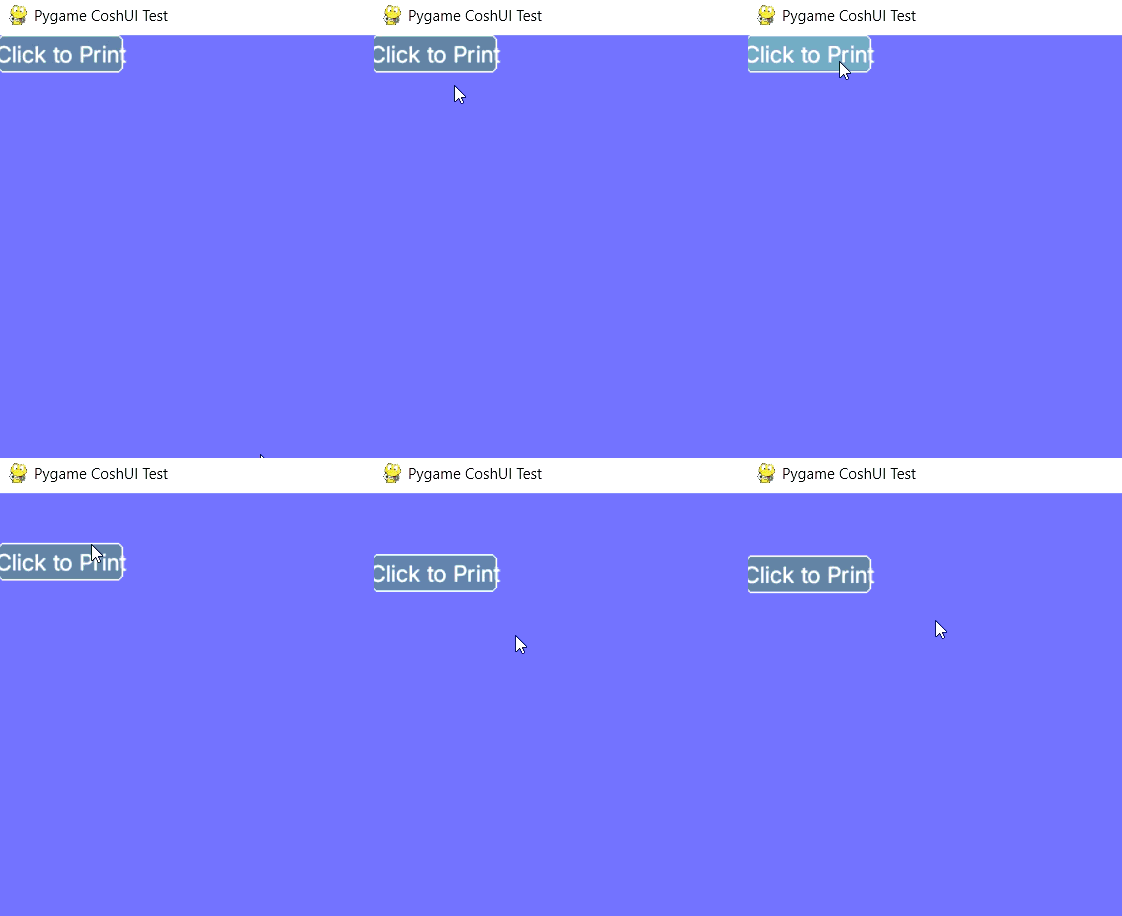
As explained, CoshUI's animation system has many parameters, and some of them aren't very straightforward, especially the Node properties you can animate and the easing curves. Here's a comprehensive list of properties you can pass to CoshUI's When it comes to easing curves, CoshUI's list is quite small currently but should be enough for most use cases. A quick note would be the To learn more about animations, check out the Animation section in the API.▸Properties and Easing Curves
animate() function.
Properties
Description
background_colorSmoothly shifts the Node's background to a new RGB color.
alphaFades the Node in or out by easing its transparency toward the target value.
transform_positionGlides the Node to a new offset position, without affecting layout.
transform_scaleGrows or shrinks the Node toward the target scale, relative to its center.
transform_rotationSpins the Node counter-clockwise toward the target rotation, in degrees.
_in suffix on the easing means the movement is applied at the beginning and the _out suffix means the movement is applied at the end. Here is CoshUI's list:
Easing Curves
Description
linearMoves at a constant speed from start to finish — no acceleration or deceleration.
ease_inStarts slow and speeds up toward the end.
ease_outStarts fast and slows down toward the end.
ease_in_outStarts slow, speeds up in the middle, then slows down again at the end.
ease_in_bounceBounces a few times right at the start before settling into motion.
ease_out_bounceSettles in with a few bounces at the end, like a ball coming to rest.
ease_in_elasticWinds up with a springy overshoot before snapping into motion.
ease_out_elasticOvershoots the target and wobbles back like a spring before settling.
Creating A Menu Screen
Now that we've decently discussed CoshUI's capabilities, let's get on to actually creating something. We'll use the same boilerplate with the same root_container Container as declared but lets get back on track to actually making a basic version of something that you or someone might try making for a game.
with cui.CoshUIRenderer(cui.PygameBackend(screen)):
    with cui.Container(id="root_container", width=cui.FILL, height=cui.FILL):
        pass
Label() widget acting as our game's title.
with cui.CoshUIRenderer(cui.PygameBackend(screen)):
    with cui.Container(id="root_container", width=cui.FILL, height=cui.FILL):
        cui.Label(id="title", text="CoshUI Test")
align and justify parameters to put it to the center like this:
with cui.CoshUIRenderer(cui.PygameBackend(screen)):
    with cui.Container(id="root_container", width=cui.FILL, height=cui.FILL, align=cui.ALIGN_CENTER, justify=cui.JUSTIFY_CENTER):
        cui.Label(id="title", text="CoshUI Test")
Label() in a container so we can set the direction to COLUMN instead of ROW:
with cui.CoshUIRenderer(cui.PygameBackend(screen)):
    with cui.Container(id="root_container", width=cui.FILL, height=cui.FILL, align=cui.ALIGN_CENTER, justify=cui.JUSTIFY_CENTER):
        with cui.Container(id="menu_container", direction=cui.COLUMN, align=cui.ALIGN_CENTER, justify=cui.JUSTIFY_CENTER):
            cui.Label(id="title", text="CoshUI Test")
            cui.Button(id="start_btn", text="Start")
            cui.Button(id="quit_btn", text="Quit")
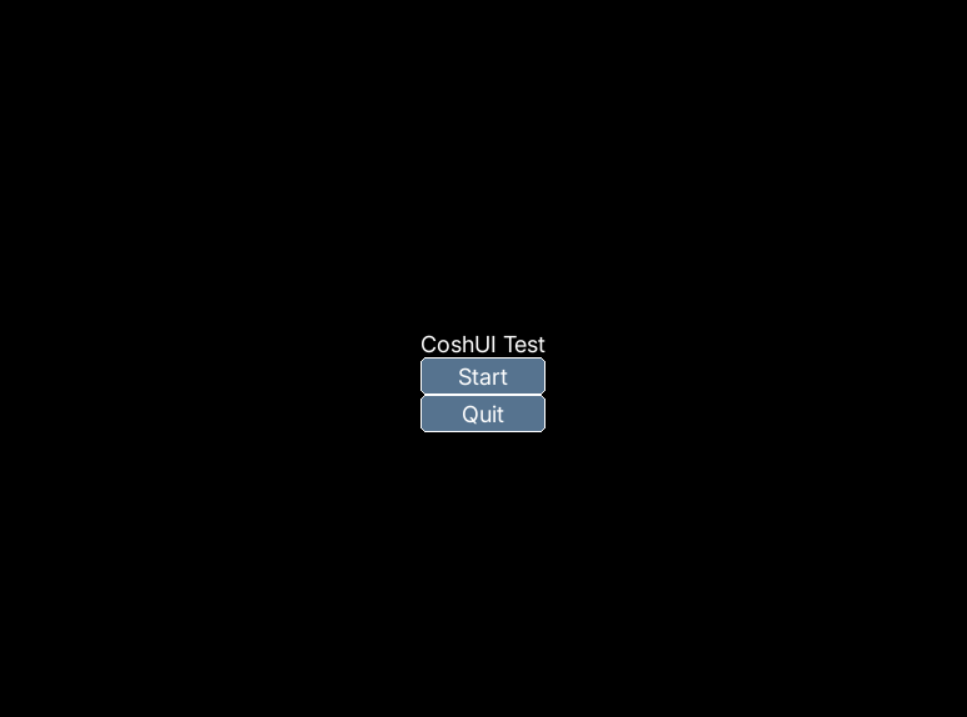
If the image loaded properly, that's how you menu screen should look like. You might think: "This doesn't really look that good...", but that's okay, these are the default values. CoshUI supports styling overrides for the default styling. So lets start that:
with cui.CoshUIRenderer(cui.PygameBackend(screen)):
    with cui.Container(id="root_container", width=cui.FILL, height=cui.FILL, align=cui.ALIGN_CENTER, justify=cui.JUSTIFY_CENTER):
        with cui.Container(id="menu_container", direction=cui.COLUMN, align=cui.ALIGN_CENTER, justify=cui.JUSTIFY_CENTER, gap=10):
            cui.Label(id="title", text="CoshUI Test", font_size=56)
            cui.Button(id="start_btn", text="Start")
            cui.Button(id="quit_btn", text="Quit")
cui.add_class(
    "menu_buttons",
    cui.CoshStyling(background_color=(220, 165, 255), border=None, border_radius=(10, 0, 10, 0))
)
with cui.CoshUIRenderer(cui.PygameBackend(screen)):
    with cui.Container(id="root_container", width=cui.FILL, height=cui.FILL, align=cui.ALIGN_CENTER, justify=cui.JUSTIFY_CENTER):
        with cui.Container(id="menu_container", direction=cui.COLUMN, align=cui.ALIGN_CENTER, justify=cui.JUSTIFY_CENTER, gap=10):
            cui.Label(id="title", text="CoshUI Test", font_size=56)
            cui.Button(id="start_btn", text="Start", classes="menu_buttons")
            cui.Button(id="quit_btn", text="Quit", classes="menu_buttons")
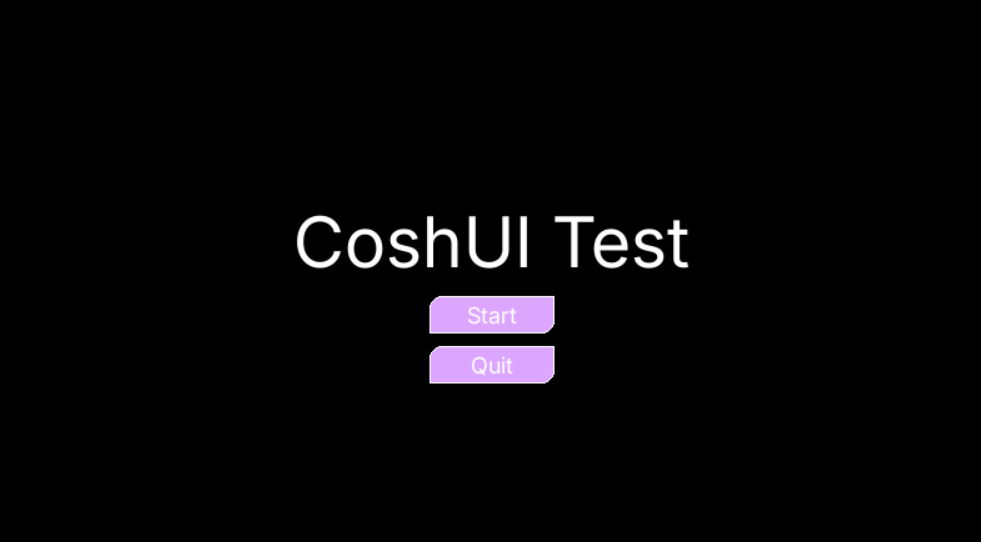
Now lets add some interaction such as making it so when you click the "Quit" button it closes the window:
with cui.CoshUIRenderer(cui.PygameBackend(screen)):
    with cui.Container(id="root_container", width=cui.FILL, height=cui.FILL, align=cui.ALIGN_CENTER, justify=cui.JUSTIFY_CENTER):
        with cui.Container(id="menu_container", direction=cui.COLUMN, align=cui.ALIGN_CENTER, justify=cui.JUSTIFY_CENTER, gap=10):
            cui.Label(id="title", text="CoshUI Test", font_size=56)
            cui.Button(id="start_btn", text="Start", classes="menu_buttons")
            cui.Button(id="quit_btn", text="Quit", classes="menu_buttons")

if cui.get_signal("quit_btn", cui.CLICKED):
    running = False
With that, the quit button should be fully functional. Before this tutorial ends though, let's add some functionality to our "Start" button, something simple like a fade out effect with CoshUI's animation system:
with cui.CoshUIRenderer(cui.PygameBackend(screen)):
    with cui.Container(id="root_container", width=cui.FILL, height=cui.FILL, align=cui.ALIGN_CENTER, justify=cui.JUSTIFY_CENTER):
        with cui.Container(id="menu_container", direction=cui.COLUMN, align=cui.ALIGN_CENTER, justify=cui.JUSTIFY_CENTER, gap=10):
            cui.Label(id="title", text="CoshUI Test", font_size=56)
            cui.Button(id="start_btn", text="Start", classes="menu_buttons")
            cui.Button(id="quit_btn", text="Quit", classes="menu_buttons")

if cui.get_signal("start_btn", cui.CLICKED):
    cui.animate("alpha", "menu_container", 0, 1.5, "linear")
if cui.get_signal("quit_btn", cui.CLICKED):
    running = False
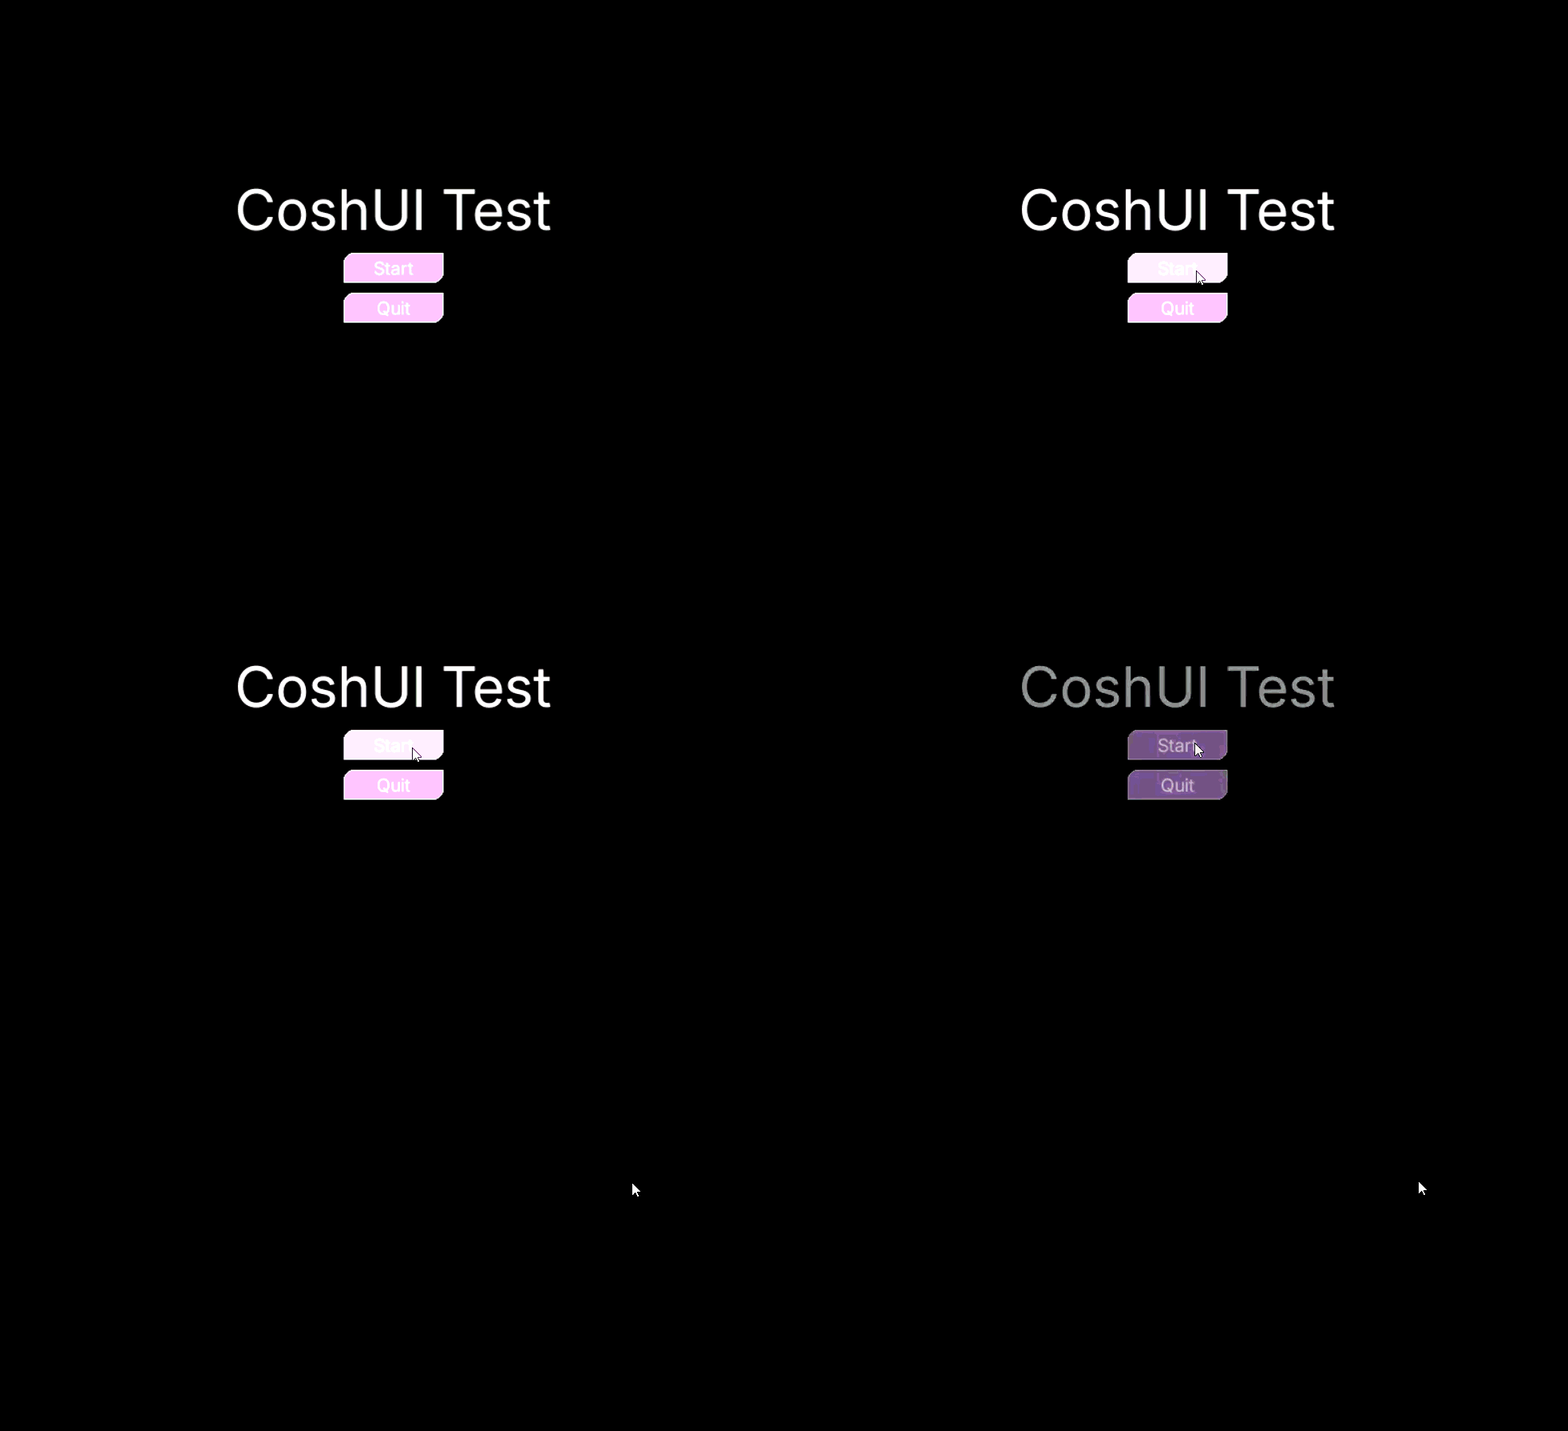
Now you might worry about the the UI still being rendered when alpha is set to 0 but you don't need to as Elements get skipped when alpha is set to 0 or if background_color has no value, so your frame budget will be less than what's necessarily there.
Final Remarks
And with that, that should give you the basic understanding of how to use CoshUI. This tutorial can't cover everything like image rendering or other widgets such as Grid, Modal, Slider, and more. So if you want to dive even deeper and create cooler things with CoshUI, you can head on over to the Learn The API section for more.
And of course, here's the final code file we worked on:
import pygame as py
import coshui as cui

WIDTH, HEIGHT = 800, 800
FPS = 60

def main():
    py.init()
    screen = py.display.set_mode((WIDTH, HEIGHT))
    py.display.set_caption("Pygame CoshUI Test")
    clock = py.time.Clock()

    cui.add_class(
        "menu_buttons",
        cui.CoshStyling(background_color=(220, 165, 255), border=None, border_radius=(10, 0, 10, 0))
    )

    running = True
    while running:
        for event in py.event.get():
            if event.type == py.QUIT:
                running = False

        screen.fill((0, 0, 0))

        with cui.CoshUIRenderer(cui.PygameBackend(screen)):
            with cui.Container(id="root_container", width=cui.FILL, height=cui.FILL, align=cui.ALIGN_CENTER, justify=cui.JUSTIFY_CENTER):
                with cui.Container(id="menu_container", direction=cui.COLUMN, align=cui.ALIGN_CENTER, justify=cui.JUSTIFY_CENTER, gap=10):
                    cui.Label(id="title", text="CoshUI Test", font_size=56)
                    cui.Button(id="start_btn", text="Start", classes="menu_buttons")
                    cui.Button(id="quit_btn", text="Quit", classes="menu_buttons")

        if cui.get_signal("start_btn", cui.CLICKED):
            cui.animate("alpha", "menu_container", 0, 1.5, "linear")
        if cui.get_signal("quit_btn", cui.CLICKED):
            running = False

        py.display.flip()
        clock.tick(FPS)

    py.quit()

if __name__ == "__main__":
    main()
Prerequisites
Python v3.10+coshuipackageraylibpydependency
If you haven't met these requirements, please go here.
Basic Boilerplate
To start us off, let's make the Raylib boilerplate that we'll use for this tutorial. If you're following along, make sure to copy this boilerplate into your file.
Do note that all UI related code that we will be working on will be within the highlighted line.
import raylibpy as rl
import coshui as cui

WIDTH, HEIGHT = 800, 800
FPS = 60

def main():
    rl.init_window(WIDTH, HEIGHT, "Raylib CoshUI Test")
    rl.set_target_fps(FPS)

    while not rl.window_should_close():
        rl.begin_drawing()
        rl.clear_background(rl.BLACK)

        # CoshUI Code Here

        rl.end_drawing()

    rl.close_window()

if __name__ == "__main__":
    main()
Setting Up CoshUIRenderer
Let us move on to the "body" of CoshUI. CoshUIRenderer() is the "entry point" of the CoshUI engine, UI syntax will not work properly without it. To set it up, you must do this:
Highlight in Boilerplate
Remember to put this code within the highlighted part of the boilerplate.
All UI code runs within this context manager (with block). It registers all CoshUI nodes, determines their order of rendering, and gives you the ability to animate and interact with them for free.
Immediate and Retained Hybrid
A note to keep in mind is that CoshUI is inherently an "immediate mode" UI library, meaning it rebuilds every Node per frame. It gets away with signals and animations because it has an internal reconciliation layer that saves and sets state per frame.
Before we move on, I'd like to discuss the parameters If set to ▸CoshUIRenderer Parameters
CoshUIRenderer() takes. It takes a CoshBackend instance for its first parameter and a CoshMode instance for its second. CoshBackend is easy to deduce, it's the backend that we pass based on what rendering pipeline we're using, but CoshMode might be a little confusing.CoshMode is defaulted to NORMAL, which makes it run normally. But one thing you can do is set it to DEBUG:
DEBUG, it will open up a tkinter window that lets you see the entire UI structure and click individual Nodes to see their properties for that frame (similar to DevTools on a browser). This is helpful for whenever need to check values for each Node.
Declaring Your First Element
Learning new UI libraries can be scary because of the new API you have to learn, but CoshUI is built to be easy to pick up without much resistance when building or migrating the UI. If you have experience with HTML then this might seem very familiar, if you don't then that's completely okay. Let's create our first Container as a Node instead of a Parent. Here's how that works:
with cui.CoshUIRenderer(cui.RaylibBackend()):
    cui.Container(id="root_container", width=100, height=100)
If you've added that to your code and ran it, you might be confused as to why nothing is showing, well no need to worry about that for now, your Container is currently invisible because it has no color. We'll get into styling in the next section.
Back to our example above, that Container instance creates a box that is 100x100 in size on the top-left of the screen. An interesting part about Containers is that they can actually act as context managers that take in children like this:
with cui.CoshUIRenderer(cui.RaylibBackend()):
    with cui.Container(id="root_container", width=100, height=100):
        cui.Container(id="child_container", width=50, height=50)
Container within the root_container that is 50x50 in size.
Node Types
From this, there might be some people thinking CoshUI is all about Containers, but the Container is one of many Nodes/Widgets in CoshUI. We'll get to the others soon.
Styling Your First Element
In other UI libraries, styling is mostly an afterthought. In CoshUI, styling is a primary part of the experience. To style a Node, you need to utilize CoshUI's CoshStyling object. It holds the properties that each Node needs to be visually distinct.
So let's first add a color to our Container. To set it, you can do this:
with cui.CoshUIRenderer(cui.RaylibBackend()):
    cui.Container(
        id="root_container",
        width=100, height=100,
        style=cui.CoshStyling(background_color=(100, 100, 255))
    )
Container at the top-left of your window.
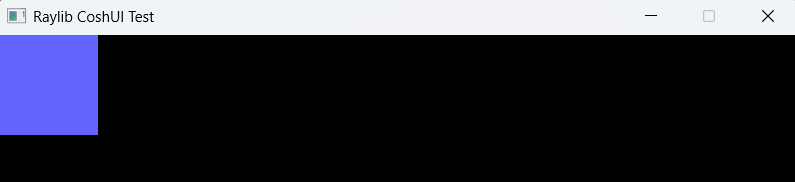
The Background Color is almost a no-brainer. Its main purpose is to declare the color of the Node. It can be set like this: Alpha is also — again — a no-brainer. It determines the transparency of a Node. It can be set like this: You may notice, background color lets you set the alpha within it. Not to worry though, if the Border sets an outline around a Node. It can be set like this: Border radius determines the roundness of a Node's corner. You can either set all corners or each individual corner like this: CoshUI has "transform" properties. Basically properties that only affect rendering, not layout. The first is The next one is The last one is To learn more about styling, check the Styling section in the API. ▸CoshStyling Parameters
CoshStyling object is what determines the visual identity of a Node. It offers a few parameters that let you change the entire look of a Node.Background Color and Alpha
background_color=(R, G, B) or background_color=(R, G, B, A).alpha=0-255.alpha field is set when the alpha value is set in background_color, the alpha field takes priority.Border
border=((R, G, B), weight) or border=(R, G, B, weight)Border Radius
border_radius=20 or border_radius=(top-left, top-right, bottom-right, bottom-left)Transforms
transform_position, which lets you offset the node relative to its position. Basically (0, 50) means it moves 50 pixels downward from its current position. It can be set like this: transform_position=(x, y)transform_scale, which changes the scale of a Node with the default being 1.0. It can be set like this: transform_scale=2.0 which makes the Node 2x bigger relative to its center.transform_rotation, which rotates the Node based counter-clockwise on the passed degree. It can be set like this: transform_rotation=45.0 which tilts the node 45 degrees counter-clockwise.
If you've noticed, styling can be somewhat tedious, especially if it's the same styles applied to multiple Nodes. To make it easier, CoshUI has a class system that you can utilize to apply the same styles to many Nodes without re-declaring the same with that, you can now pass in that style to a Node by passing it through the The cool thing about classes is that you can pass in multiple classes at the same time, so if you declare multiple classes with different styling for each, the Node will take in all of it like this: You can pass multiple classes like this where you just add in a space to the string, but if your class name itself has a space (for some reason), it's better to pass it through a list like this: Class Ordering A question appears with multiple classes, what styles get added if there are conflicting styles? In CoshUI, the classes that are added later in the Example:
If you want to learn more about reusable styling, check out the Classes section in the API.▸Reusable Styling Through Classes
CoshStyling object. To use it you have to declare the class and the CoshStyling object before the main while loop like this:# This is called BEFORE the while loop.
cui.add_class(
"example_class",
cui.CoshStyling(background_color=(255, 100, 100), border_radius=10, border=((255, 255, 255), 5))
)
classes field with the string itself (classes="example_class") or a list (classes=["example_class"]). Here's an example:with cui.CoshUIRenderer(cui.RaylibBackend()):
cui.Container(
id="root_container",
width=100, height=100,
classes="example_class"
)
# Outside the while loop
cui.add_class(
    "example_class",
    cui.CoshStyling(background_color=(255, 100, 100), border_radius=10, border=((255, 255, 255), 5))
)
cui.add_class(
    "example_class2",
    cui.CoshStyling(alpha=150)
)

# in CoshUIRenderer
with cui.CoshUIRenderer(cui.RaylibBackend()):
    cui.Container(
        id="root_container",
        width=100, height=100,
        classes="example_class example_class2"
    )
classes field will override the ones added before. In the example above, if the two classes had conflicting properties, the one added latest will override the ones before. And of course, explicit styling (styles directly added through the style field) takes highest priority.
Layout Fundamentals
Before moving on, let's learn a little bit about the layout properties you can set which gives you maximum control over your UI.
As this is a little much to take on all at once, I've made every part collapsible so it's easier to digest one at a time.
As shown in earlier sections, you can set width and height. These two properties are Universal Properties, meaning they exist and can be set in every Node within CoshUI. They determine the size of your Node based on pixels. Here are the 4 ways to set width and height: To learn more, check out the Width and Height section in the API.▸Width and Height
# Fixed
cui.Container(
    width=100
)
# Fill
cui.Container(
    width=cui.FILL
)
# AUTO
cui.Container(
    width=cui.AUTO
)
# Percentage
cui.Container(
    width=cui.PERCENTAGE(75)
)
Margin is a Universal Property whilst padding is a Local Property and can only be set within To learn more, check out the Padding and Margin section in the API.▸Padding and Margin
ParentNodes (Nodes that can take in children). An example of a ParentNode would be Container. Margin is the property that dictates the space other nodes need to give around that specific Node, while padding dictates the distance the children should be from the edges of that ParentNode. You can set padding and margin like this:
Positioning is a simple toggle in CoshUI. It determines whether a Node will be added to the layout calculations or not. The default is To learn more, check out the Positioning section in the API.▸Positioning
RELATIVE, meaning it will take up space and other Nodes will respect that space, setting it to ABSOLUTE makes it so that Node no longer gets added to layout calculations. Other Nodes will take that Node's space, kind of like it doesn't exist anymore to them. This also opens up the x and y parameters discussed next. Setting positioning is like this:# ABSOLUTE
cui.Container(positioning=cui.ABSOLUTE)
# RELATIVE (This is default so there's no point in setting this)
cui.Container(positioning=cui.RELATIVE)
Position in CoshUI refers to the To learn more, check out the Position section in the API.▸Position
x and y properties, and these are a bit special. It can only be mutated when the positioning parameter is set to ABSOLUTE, if not then adding values to x and y does nothing. What x and y do is directly offsets the position (relative to the parent) of the node layout-wise. To set x and y, you need to first set positioning to ABSOLUTE first, like this:
The As this is a complex topic, it is encouraged to check the Align and Justify section in the API.▸Align and Justify
align and justify properties for CoshUI are Local Properties, they are accessible only through ParentNodes like Container or Grid. They determine the position of that Nodes children within itself. They can be set like this:# Note that these are only accessible through ParentNodes.
cui.Container(align=cui.ALIGN_CENTER, justify=cui.JUSTIFY_CENTER)
# These are the values you can set align and justify to.
align=cui.ALIGN_START
align=cui.ALIGN_CENTER
align=cui.ALIGN_END
justify=cui.JUSTIFY_START
justify=cui.JUSTIFY_CENTER
justify=cui.JUSTIFY_END
justify=cui.JUSTIFY_SPACE_AROUND
justify=cui.JUSTIFY_SPACE_BETWEEN
justify=cui.JUSTIFY_SPACE_EVENLY
The The example above makes it so the children of the ▸Gap
gap property only exists in ParentNodes. It's a simple property, it all it does is determine the gap children will have between each other. Here's how to set it:Container will have a gap of 10 pixels between each other.
The You can set it to both ▸Direction
direction property is a property that only the Container widget possesses, it determines whether children will be placed horizontally or vertically. It's default value is ROW and setting it is simple:ROW and COLUMN, but ROW is default so there's no point in setting it unless you want to be explicit.
Introducing Signals
If you've used other UI frameworks, interaction systems usually use callback systems, which can be rather complex and a bit of a mess to set up. In CoshUI however, you can use what's called a "signal". Every Node will emit one, so if a Node is hovered over it will emit a HOVERED signal, if it is clicked it will emit a CLICKED signal. This comes automatically so users only need to poll those signals to check whether an event has happened to a Node or not, which lets you run your code if it has.
Let's declare a Button() — one of CoshUI's many widgets — and see how it works. Let's also make it so the Container's width and height fill the entire screen, here's how that will work:
with cui.CoshUIRenderer(cui.RaylibBackend()):
    with cui.Container(
        id="root_container",
        width=cui.FILL, height=cui.FILL,
        style=cui.CoshStyling(background_color=(100, 100, 255))
    ):
        cui.Button(id="example_button", text="Click to Print")
if statement with the get_signal() function that CoshUI provides:
with cui.CoshUIRenderer(cui.RaylibBackend()):
    with cui.Container(
        id="root_container",
        width=cui.FILL, height=cui.FILL,
        style=cui.CoshStyling(background_color=(100, 100, 255))
    ):
        cui.Button(id="example_button", text="Click to Print")

if cui.get_signal("example_button", cui.CLICKED):
    print("Hello World!")
get_signal() takes in 2 parameters, the id of the Node you want to capture signals from and the event you want to poll. Once you click the button, it will now print Hello World! in the terminal.
A nice thing about the signal system is that it works for every Node, not just buttons. If you want to see if a Container was clicked, you can poll it as long as it has an id. It's also additive, meaning if you make a signal on the same Node, it doesn't override others.
Example:
with cui.CoshUIRenderer(cui.RaylibBackend()):
    cui.Container(
        id="root_container",
        width=cui.FILL, height=cui.FILL,
        style=cui.CoshStyling(background_color=(100, 100, 255))
    )

if cui.get_signal("root_container", cui.CLICKED):
    print("Hello World!")
In CoshUI, there are ways to customize how a Node receives and consumes interaction events. We can achieve that with the The first value you can set Next value is Last value is ▸Mouse Filters
mouse_filter field which is a Universal Property. mouse_filter to is IGNORE:PASS:STOP:
As you may have already guessed, but there are quite a few interactions that can be passed in to the signal system. Here's what they are: These can be passed to the second parameter of the ▸Different Interactions
# Checks if the node was just clicked.
cui.CLICKED

# Checks if the node was just released from a click event.
cui.RELEASED

# Checks if the node is being clicked that frame.
cui.PRESSED

# Checks if the cursor entered the Node's boundaries.
cui.HOVER_ENTER

# Checks if the cursor exited the Node's boundaries.
cui.HOVER_EXIT

# Checks if the cursor is within the Node's boundaries.
cui.HOVERED
get_signal() function. To learn more, check the Signals section in the API.
Introducing Animations
When using other UI libraries, I'm willing to bet most of them have little to no built-in animation systems. Some may have external libraries that help with animations but for the most part, animations are either fully missing or not even considered a first-class citizen.
CoshUI is different, it has its own animation system built upon the reconciliation structure. You've most probably seen it work in the previous section as the Button() widget has built-in animations.
So let's address how to animate Nodes. CoshUI has an animate() function that takes in 5 parameters, n_property, target_id, end_value, duration, and finally easing. Here's an example of how it works:
if cui.get_signal("example_button", cui.CLICKED):
    cui.animate("transform_position", "example_button", (0, 50), 1.5, "ease_out_bounce")
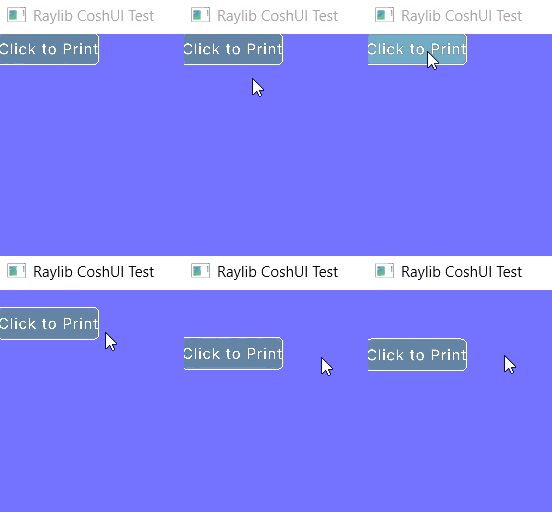
As explained, CoshUI's animation system has many parameters, and some of them aren't very straightforward, especially the Node properties you can animate and the easing curves. Here's a comprehensive list of properties you can pass to CoshUI's When it comes to easing curves, CoshUI's list is quite small currently but should be enough for most use cases. A quick note would be the To learn more about animations, check out the Animation section in the API.▸Properties and Easing Curves
animate() function.
Properties
Description
background_colorSmoothly shifts the Node's background to a new RGB color.
alphaFades the Node in or out by easing its transparency toward the target value.
transform_positionGlides the Node to a new offset position, without affecting layout.
transform_scaleGrows or shrinks the Node toward the target scale, relative to its center.
transform_rotationSpins the Node counter-clockwise toward the target rotation, in degrees.
_in suffix on the easing means the movement is applied at the beginning and the _out suffix means the movement is applied at the end. Here is CoshUI's list:
Easing Curves
Description
linearMoves at a constant speed from start to finish — no acceleration or deceleration.
ease_inStarts slow and speeds up toward the end.
ease_outStarts fast and slows down toward the end.
ease_in_outStarts slow, speeds up in the middle, then slows down again at the end.
ease_in_bounceBounces a few times right at the start before settling into motion.
ease_out_bounceSettles in with a few bounces at the end, like a ball coming to rest.
ease_in_elasticWinds up with a springy overshoot before snapping into motion.
ease_out_elasticOvershoots the target and wobbles back like a spring before settling.
Creating A Menu Screen
Now that we've decently discussed CoshUI's capabilities, let's get on to actually creating something. We'll use the same boilerplate with the same root_container Container as declared but lets get back on track to actually making a basic version of something that you or someone might try making for a game.
with cui.CoshUIRenderer(cui.RaylibBackend()):
    with cui.Container(id="root_container", width=cui.FILL, height=cui.FILL):
        pass
Label() widget acting as our game's title.
with cui.CoshUIRenderer(cui.RaylibBackend()):
    with cui.Container(id="root_container", width=cui.FILL, height=cui.FILL):
        cui.Label(id="title", text="CoshUI Test")
align and justify parameters to put it to the center like this:
with cui.CoshUIRenderer(cui.RaylibBackend()):
    with cui.Container(id="root_container", width=cui.FILL, height=cui.FILL, align=cui.ALIGN_CENTER, justify=cui.JUSTIFY_CENTER):
        cui.Label(id="title", text="CoshUI Test")
Label() in a container so we can set the direction to COLUMN instead of ROW:
with cui.CoshUIRenderer(cui.RaylibBackend()):
    with cui.Container(id="root_container", width=cui.FILL, height=cui.FILL, align=cui.ALIGN_CENTER, justify=cui.JUSTIFY_CENTER):
        with cui.Container(id="menu_container", direction=cui.COLUMN, align=cui.ALIGN_CENTER, justify=cui.JUSTIFY_CENTER):
            cui.Label(id="title", text="CoshUI Test")
            cui.Button(id="start_btn", text="Start")
            cui.Button(id="quit_btn", text="Quit")
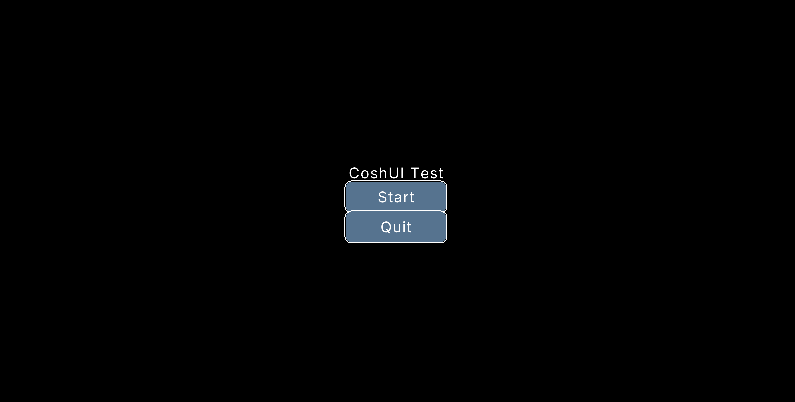
If the image loaded properly, that's how you menu screen should look like. You might think: "This doesn't really look that good...", but that's okay, these are the default values. CoshUI supports styling overrides for the default styling. So lets start that:
with cui.CoshUIRenderer(cui.RaylibBackend()):
    with cui.Container(id="root_container", width=cui.FILL, height=cui.FILL, align=cui.ALIGN_CENTER, justify=cui.JUSTIFY_CENTER):
        with cui.Container(id="menu_container", direction=cui.COLUMN, align=cui.ALIGN_CENTER, justify=cui.JUSTIFY_CENTER, gap=10):
            cui.Label(id="title", text="CoshUI Test", font_size=56)
            cui.Button(id="start_btn", text="Start")
            cui.Button(id="quit_btn", text="Quit")
cui.add_class(
    "menu_buttons",
    cui.CoshStyling(background_color=(220, 165, 255), border=None, border_radius=(10, 0, 10, 0))
)
with cui.CoshUIRenderer(cui.RaylibBackend()):
    with cui.Container(id="root_container", width=cui.FILL, height=cui.FILL, align=cui.ALIGN_CENTER, justify=cui.JUSTIFY_CENTER):
        with cui.Container(id="menu_container", direction=cui.COLUMN, align=cui.ALIGN_CENTER, justify=cui.JUSTIFY_CENTER, gap=10):
            cui.Label(id="title", text="CoshUI Test", font_size=56)
            cui.Button(id="start_btn", text="Start", classes="menu_buttons")
            cui.Button(id="quit_btn", text="Quit", classes="menu_buttons")
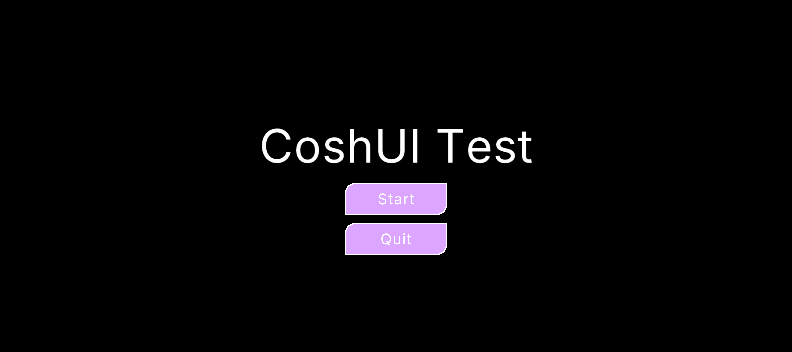
Now lets add some interaction such as making it so when you click the "Quit" button it closes the window:
with cui.CoshUIRenderer(cui.RaylibBackend()):
    with cui.Container(id="root_container", width=cui.FILL, height=cui.FILL, align=cui.ALIGN_CENTER, justify=cui.JUSTIFY_CENTER):
        with cui.Container(id="menu_container", direction=cui.COLUMN, align=cui.ALIGN_CENTER, justify=cui.JUSTIFY_CENTER, gap=10):
            cui.Label(id="title", text="CoshUI Test", font_size=56)
            cui.Button(id="start_btn", text="Start", classes="menu_buttons")
            cui.Button(id="quit_btn", text="Quit", classes="menu_buttons")

if cui.get_signal("quit_btn", cui.CLICKED):
    break
With that, the quit button should be fully functional. Before this tutorial ends though, let's add some functionality to our "Start" button, something simple like a fade out effect with CoshUI's animation system:
with cui.CoshUIRenderer(cui.RaylibBackend()):
    with cui.Container(id="root_container", width=cui.FILL, height=cui.FILL, align=cui.ALIGN_CENTER, justify=cui.JUSTIFY_CENTER):
        with cui.Container(id="menu_container", direction=cui.COLUMN, align=cui.ALIGN_CENTER, justify=cui.JUSTIFY_CENTER, gap=10):
            cui.Label(id="title", text="CoshUI Test", font_size=56)
            cui.Button(id="start_btn", text="Start", classes="menu_buttons")
            cui.Button(id="quit_btn", text="Quit", classes="menu_buttons")

if cui.get_signal("start_btn", cui.CLICKED):
    cui.animate("alpha", "menu_container", 0, 1.5, "linear")
if cui.get_signal("quit_btn", cui.CLICKED):
    break
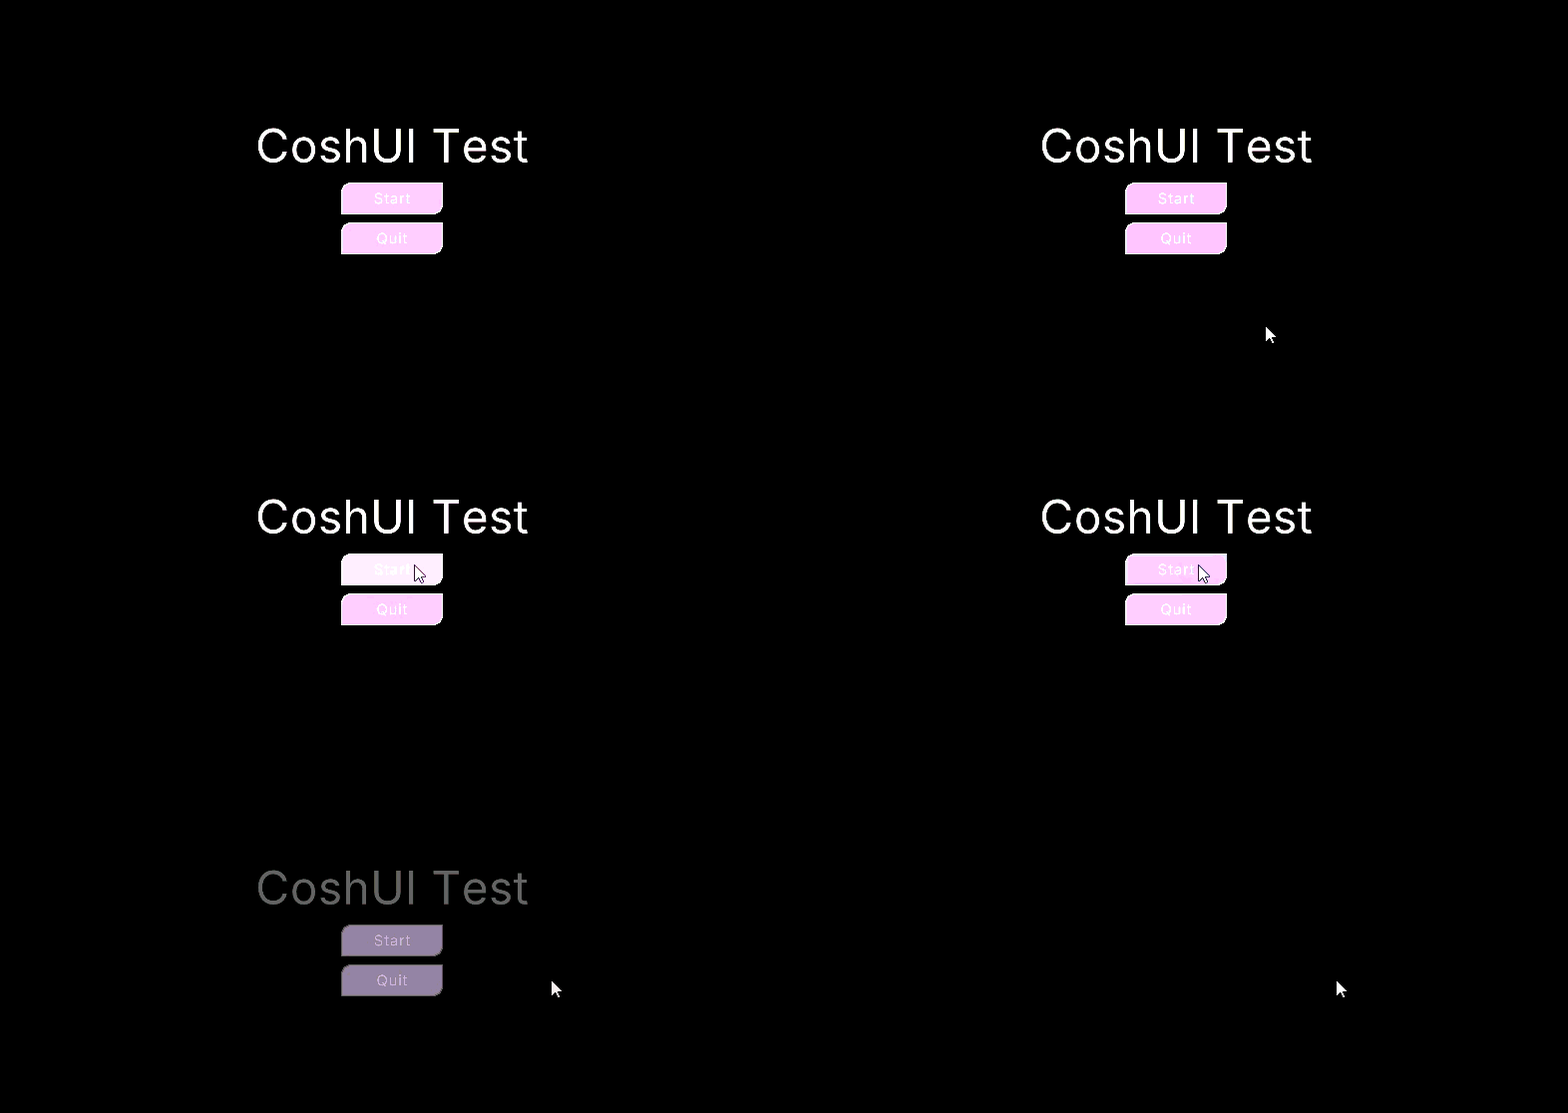
Now you might worry about the the UI still being rendered when alpha is set to 0 but you don't need to as Elements get skipped when alpha is set to 0 or if background_color has no value, so your frame budget will be less than what's necessarily there.
Final Remarks
And with that, that should give you the basic understanding of how to use CoshUI. This tutorial can't cover everything like image rendering or other widgets such as Grid, Modal, Slider, and more. So if you want to dive even deeper and create cooler things with CoshUI, you can head on over to the Learn The API section for more.
And of course, here's the final code file we worked on:
import raylibpy as rl
import coshui as cui

WIDTH, HEIGHT = 800, 800
FPS = 60

def main():
    rl.init_window(WIDTH, HEIGHT, "Raylib CoshUI Test")
    rl.set_target_fps(FPS)

    cui.add_class(
        "menu_buttons",
        cui.CoshStyling(background_color=(220, 165, 255), border=None, border_radius=(10, 0, 10, 0))
    )

    while not rl.window_should_close():
        rl.begin_drawing()
        rl.clear_background(rl.BLACK)

        with cui.CoshUIRenderer(cui.RaylibBackend()):
            with cui.Container(id="root_container", width=cui.FILL, height=cui.FILL, align=cui.ALIGN_CENTER, justify=cui.JUSTIFY_CENTER):
                with cui.Container(id="menu_container", direction=cui.COLUMN, align=cui.ALIGN_CENTER, justify=cui.JUSTIFY_CENTER, gap=10):
                    cui.Label(id="title", text="CoshUI Test", font_size=56)
                    cui.Button(id="start_btn", text="Start", classes="menu_buttons")
                    cui.Button(id="quit_btn", text="Quit", classes="menu_buttons")

        # This can be after end_drawing() but there's no difference really.
        if cui.get_signal("start_btn", cui.CLICKED):
            cui.animate("alpha", "menu_container", 0, 1.5, "linear")
        if cui.get_signal("quit_btn", cui.CLICKED):
            break

        rl.end_drawing()

    rl.close_window()

if __name__ == "__main__":
    main()
Prerequisites
Python v3.10+coshuipackagePyOpenGLdependencyPyOpenGL_acceleratedependency (this is optional)
If you haven't met these requirements, please go here.
Basic Boilerplate
To start us off, let's make the PyOpenGL with GLFW boilerplate that we'll use for this tutorial. If you're following along, make sure to copy this boilerplate into your file.
Do note that all UI related code that we will be working on will be within the highlighted line.
import glfw
from OpenGL.GL import *
import coshui as cui

def main():
    if not glfw.init(): return

    window = glfw.create_window(800, 800, "PyOpenGL::GLFW CoshUI Test", None, None)
    if not window:
        glfw.terminate()
        return

    glfw.make_context_current(window)

    glClearColor(0.0, 0.0, 0.0, 1.0)

    while not glfw.window_should_close(window):
        glClear(GL_COLOR_BUFFER_BIT | GL_DEPTH_BUFFER_BIT)

        # CoshUI Code Here

        glfw.swap_buffers(window)
        glfw.poll_events()

    glfw.terminate()

if __name__ == "__main__":
    main()
Setting Up CoshUIRenderer
Let us move on to the "body" of CoshUI. CoshUIRenderer() is the "entry point" of the CoshUI engine, UI syntax will not work properly without it. To set it up for PyOpenGL, you must do this:
# Before the while loop
backend = cui.PyOpenGLBackend(cui.GLFW)

while not glfw.window_should_close(window):
    ...
Highlight in Boilerplate
Remember to put this code within the highlighted part of the boilerplate.
All UI code runs within this context manager (with block). It registers all CoshUI nodes, determines their order of rendering, and gives you the ability to animate and interact with them for free.
Immediate and Retained Hybrid
A note to keep in mind is that CoshUI is inherently an "immediate mode" UI library, meaning it rebuilds every Node per frame. It gets away with signals and animations because it has an internal reconciliation layer that saves and sets state per frame.
Before we move on, I'd like to discuss the parameters If set to ▸CoshUIRenderer Parameters
CoshUIRenderer() takes. It takes a CoshBackend instance for its first parameter and a CoshMode instance for its second. CoshBackend is easy to deduce, it's the backend that we pass based on what rendering pipeline we're using, but CoshMode might be a little confusing.CoshMode is defaulted to NORMAL, which makes it run normally. But one thing you can do is set it to DEBUG:
DEBUG, it will open up a tkinter window that lets you see the entire UI structure and click individual Nodes to see their properties for that frame (similar to DevTools on a browser). This is helpful for whenever need to check values for each Node.
Declaring Your First Element
Learning new UI libraries can be scary because of the new API you have to learn, but CoshUI is built to be easy to pick up without much resistance when building or migrating the UI. If you have experience with HTML then this might seem very familiar, if you don't then that's completely okay. Let's create our first Container as a Node instead of a Parent. Here's how that works:
with cui.CoshUIRenderer(backend):
    cui.Container(id="root_container", width=100, height=100)
If you've added that to your code and ran it, you might be confused as to why nothing is showing, well no need to worry about that for now, your Container is currently invisible because it has no color. We'll get into styling in the next section.
Back to our example above, that Container instance creates a box that is 100x100 in size on the top-left of the screen. An interesting part about Containers is that they can actually act as context managers that take in children like this:
with cui.CoshUIRenderer(backend):
    with cui.Container(id="root_container", width=100, height=100):
        cui.Container(id="child_container", width=50, height=50)
Container within the root_container that is 50x50 in size.
Node Types
From this, there might be some people thinking CoshUI is all about Containers, but the Container is one of many Nodes/Widgets in CoshUI. We'll get to the others soon.
Styling Your First Element
In other UI libraries, styling is mostly an afterthought. In CoshUI, styling is a primary part of the experience. To style a Node, you need to utilize CoshUI's CoshStyling object. It holds the properties that each Node needs to be visually distinct.
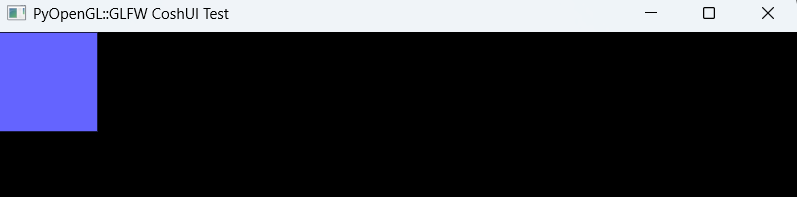
So let's first add a color to our Container. To set it, you can do this:
with cui.CoshUIRenderer(backend):
    cui.Container(
        id="root_container",
        width=100, height=100,
        style=cui.CoshStyling(background_color=(100, 100, 255))
    )
Container at the top-left of your window.
The Background Color is almost a no-brainer. Its main purpose is to declare the color of the Node. It can be set like this: Alpha is also — again — a no-brainer. It determines the transparency of a Node. It can be set like this: You may notice, background color lets you set the alpha within it. Not to worry though, if the Border sets an outline around a Node. It can be set like this: Border radius determines the roundness of a Node's corner. You can either set all corners or each individual corner like this: CoshUI has "transform" properties. Basically properties that only affect rendering, not layout. The first is The next one is The last one is To learn more about styling, check the Styling section in the API. ▸CoshStyling Parameters
CoshStyling object is what determines the visual identity of a Node. It offers a few parameters that let you change the entire look of a Node.Background Color and Alpha
background_color=(R, G, B) or background_color=(R, G, B, A).alpha=0-255.alpha field is set when the alpha value is set in background_color, the alpha field takes priority.Border
border=((R, G, B), weight) or border=(R, G, B, weight)Border Radius
border_radius=20 or border_radius=(top-left, top-right, bottom-right, bottom-left)Transforms
transform_position, which lets you offset the node relative to its position. Basically (0, 50) means it moves 50 pixels downward from its current position. It can be set like this: transform_position=(x, y)transform_scale, which changes the scale of a Node with the default being 1.0. It can be set like this: transform_scale=2.0 which makes the Node 2x bigger relative to its center.transform_rotation, which rotates the Node based counter-clockwise on the passed degree. It can be set like this: transform_rotation=45.0 which tilts the node 45 degrees counter-clockwise.
If you've noticed, styling can be somewhat tedious, especially if it's the same styles applied to multiple Nodes. To make it easier, CoshUI has a class system that you can utilize to apply the same styles to many Nodes without re-declaring the same with that, you can now pass in that style to a Node by passing it through the The cool thing about classes is that you can pass in multiple classes at the same time, so if you declare multiple classes with different styling for each, the Node will take in all of it like this: You can pass multiple classes like this where you just add in a space to the string, but if your class name itself has a space (for some reason), it's better to pass it through a list like this: Class Ordering A question appears with multiple classes, what styles get added if there are conflicting styles? In CoshUI, the classes that are added later in the Example:
If you want to learn more about reusable styling, check out the Classes section in the API.▸Reusable Styling Through Classes
CoshStyling object. To use it you have to declare the class and the CoshStyling object before the main while loop like this:# This is called BEFORE the while loop.
cui.add_class(
"example_class",
cui.CoshStyling(background_color=(255, 100, 100), border_radius=10, border=((255, 255, 255), 5))
)
classes field with the string itself (classes="example_class") or a list (classes=["example_class"]). Here's an example:with cui.CoshUIRenderer(backend):
cui.Container(
id="root_container",
width=100, height=100,
classes="example_class"
)
# Outside the while loop
cui.add_class(
    "example_class",
    cui.CoshStyling(background_color=(255, 100, 100), border_radius=10, border=((255, 255, 255), 5))
)
cui.add_class(
    "example_class2",
    cui.CoshStyling(alpha=150)
)

# in CoshUIRenderer
with cui.CoshUIRenderer(backend):
    cui.Container(
        id="root_container",
        width=100, height=100,
        classes="example_class example_class2"
    )
classes field will override the ones added before. In the example above, if the two classes had conflicting properties, the one added latest will override the ones before. And of course, explicit styling (styles directly added through the style field) takes highest priority.
Layout Fundamentals
Before moving on, let's learn a little bit about the layout properties you can set which gives you maximum control over your UI.
As this is a little much to take on all at once, I've made every part collapsible so it's easier to digest one at a time.
As shown in earlier sections, you can set width and height. These two properties are Universal Properties, meaning they exist and can be set in every Node within CoshUI. They determine the size of your Node based on pixels. Here are the 4 ways to set width and height: To learn more, check out the Width and Height section in the API.▸Width and Height
# Fixed
cui.Container(
    width=100
)
# Fill
cui.Container(
    width=cui.FILL
)
# AUTO
cui.Container(
    width=cui.AUTO
)
# Percentage
cui.Container(
    width=cui.PERCENTAGE(75)
)
Margin is a Universal Property whilst padding is a Local Property and can only be set within To learn more, check out the Padding and Margin section in the API.▸Padding and Margin
ParentNodes (Nodes that can take in children). An example of a ParentNode would be Container. Margin is the property that dictates the space other nodes need to give around that specific Node, while padding dictates the distance the children should be from the edges of that ParentNode. You can set padding and margin like this:
Positioning is a simple toggle in CoshUI. It determines whether a Node will be added to the layout calculations or not. The default is To learn more, check out the Positioning section in the API.▸Positioning
RELATIVE, meaning it will take up space and other Nodes will respect that space, setting it to ABSOLUTE makes it so that Node no longer gets added to layout calculations. Other Nodes will take that Node's space, kind of like it doesn't exist anymore to them. This also opens up the x and y parameters discussed next. Setting positioning is like this:# ABSOLUTE
cui.Container(positioning=cui.ABSOLUTE)
# RELATIVE (This is default so there's no point in setting this)
cui.Container(positioning=cui.RELATIVE)
Position in CoshUI refers to the To learn more, check out the Position section in the API.▸Position
x and y properties, and these are a bit special. It can only be mutated when the positioning parameter is set to ABSOLUTE, if not then adding values to x and y does nothing. What x and y do is directly offsets the position (relative to the parent) of the node layout-wise. To set x and y, you need to first set positioning to ABSOLUTE first, like this:
The As this is a complex topic, it is encouraged to check the Align and Justify section in the API.▸Align and Justify
align and justify properties for CoshUI are Local Properties, they are accessible only through ParentNodes like Container or Grid. They determine the position of that Nodes children within itself. They can be set like this:# Note that these are only accessible through ParentNodes.
cui.Container(align=cui.ALIGN_CENTER, justify=cui.JUSTIFY_CENTER)
# These are the values you can set align and justify to.
align=cui.ALIGN_START
align=cui.ALIGN_CENTER
align=cui.ALIGN_END
justify=cui.JUSTIFY_START
justify=cui.JUSTIFY_CENTER
justify=cui.JUSTIFY_END
justify=cui.JUSTIFY_SPACE_AROUND
justify=cui.JUSTIFY_SPACE_BETWEEN
justify=cui.JUSTIFY_SPACE_EVENLY
The The example above makes it so the children of the ▸Gap
gap property only exists in ParentNodes. It's a simple property, all it does is determine the gap children will have between each other. Here's how to set it:Container will have a gap of 10 pixels between each other.
The You can set it to both ▸Direction
direction property is a property that only the Container widget possesses, it determines whether children will be placed horizontally or vertically. It's default value is ROW and setting it is simple:ROW and COLUMN, but ROW is default so there's no point in setting it unless you want to be explicit.
Introducing Signals
If you've used other UI frameworks, interaction systems usually use callback systems, which can be rather complex and a bit of a mess to set up. In CoshUI however, you can use what's called a "signal". Every Node will emit one, so if a Node is hovered over it will emit a HOVERED signal, if it is clicked it will emit a CLICKED signal. This comes automatically so users only need to poll those signals to check whether an event has happened to a Node or not, which lets you run your code if it has.
Let's declare a Button() — one of CoshUI's many widgets — and see how it works. Let's also make it so the Container's width and height fill the entire screen, here's how that will work:
with cui.CoshUIRenderer(backend):
    with cui.Container(
        id="root_container",
        width=cui.FILL, height=cui.FILL,
        style=cui.CoshStyling(background_color=(100, 100, 255))
    ):
        cui.Button(id="example_button", text="Click to Print")
if statement with the get_signal() function that CoshUI provides:
with cui.CoshUIRenderer(backend):
    with cui.Container(
        id="root_container",
        width=cui.FILL, height=cui.FILL,
        style=cui.CoshStyling(background_color=(100, 100, 255))
    ):
        cui.Button(id="example_button", text="Click to Print")

if cui.get_signal("example_button", cui.CLICKED):
    print("Hello World!")
get_signal() takes in 2 parameters, the id of the Node you want to capture signals from and the event you want to poll. Once you click the button, it will now print Hello World! in the terminal.
A nice thing about the signal system is that it works for every Node, not just buttons. If you want to see if a Container was clicked, you can poll it as long as it has an id. It's also additive, meaning if you make a signal on the same Node, it doesn't override others.
Example:
with cui.CoshUIRenderer(backend):
    cui.Container(
        id="root_container",
        width=cui.FILL, height=cui.FILL,
        style=cui.CoshStyling(background_color=(100, 100, 255))
    )

if cui.get_signal("root_container", cui.CLICKED):
    print("Hello World!")
In CoshUI, there are ways to customize how a Node receives and consumes interaction events. We can achieve that with the The first value you can set Next value is Last value is ▸Mouse Filters
mouse_filter field which is a Universal Property. mouse_filter to is IGNORE:PASS:STOP:
As you may have already guessed, there are quite a few interactions that can be passed in to the signal system. Here's what they are: These can be passed to the second parameter of the ▸Different Interactions
# Checks if the node was just clicked.
cui.CLICKED

# Checks if the node was just released from a click event.
cui.RELEASED

# Checks if the node is being clicked that frame.
cui.PRESSED

# Checks if the cursor entered the Node's boundaries.
cui.HOVER_ENTER

# Checks if the cursor exited the Node's boundaries.
cui.HOVER_EXIT

# Checks if the cursor is within the Node's boundaries.
cui.HOVERED
get_signal() function. To learn more, check the Signals section in the API.
Introducing Animations
When using other UI libraries, I'm willing to bet most of them have little to no built-in animation systems. Some may have external libraries that help with animations but for the most part, animations are either fully missing or not even considered a first-class citizen.
CoshUI is different, it has its own animation system built upon the reconciliation structure. You've most probably seen it work in the previous section as the Button() widget has built-in animations.
So let's address how to animate Nodes. CoshUI has an animate() function that takes in 5 parameters, n_property, target_id, end_value, duration, and finally easing. Here's an example of how it works:
if cui.get_signal("example_button", cui.CLICKED):
    cui.animate("transform_position", "example_button", (0, 50), 1.5, "ease_out_bounce")
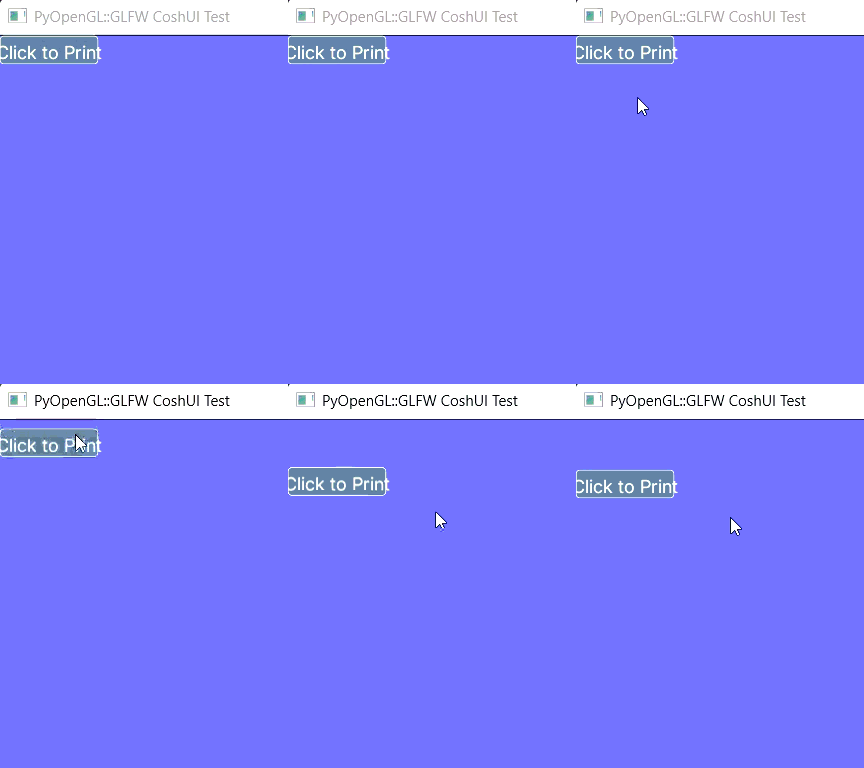
As explained, CoshUI's animation system has many parameters, and some of them aren't very straightforward, especially the Node properties you can animate and the easing curves. Here's a comprehensive list of properties you can pass to CoshUI's When it comes to easing curves, CoshUI's list is quite small currently but should be enough for most use cases. A quick note would be the To learn more about animations, check out the Animation section in the API.▸Properties and Easing Curves
animate() function.
Properties
Description
background_colorSmoothly shifts the Node's background to a new RGB color.
alphaFades the Node in or out by easing its transparency toward the target value.
transform_positionGlides the Node to a new offset position, without affecting layout.
transform_scaleGrows or shrinks the Node toward the target scale, relative to its center.
transform_rotationSpins the Node counter-clockwise toward the target rotation, in degrees.
_in suffix on the easing means the movement is applied at the beginning and the _out suffix means the movement is applied at the end. Here is CoshUI's list:
Easing Curves
Description
linearMoves at a constant speed from start to finish — no acceleration or deceleration.
ease_inStarts slow and speeds up toward the end.
ease_outStarts fast and slows down toward the end.
ease_in_outStarts slow, speeds up in the middle, then slows down again at the end.
ease_in_bounceBounces a few times right at the start before settling into motion.
ease_out_bounceSettles in with a few bounces at the end, like a ball coming to rest.
ease_in_elasticWinds up with a springy overshoot before snapping into motion.
ease_out_elasticOvershoots the target and wobbles back like a spring before settling.
Creating A Menu Screen
Now that we've decently discussed CoshUI's capabilities, let's get on to actually creating something. We'll use the same boilerplate with the same root_container Container as declared but lets get back on track to actually making a basic version of something that you or someone might try making for a game.
with cui.CoshUIRenderer(backend):
    with cui.Container(id="root_container", width=cui.FILL, height=cui.FILL):
        pass
Label() widget acting as our game's title.
with cui.CoshUIRenderer(backend):
    with cui.Container(id="root_container", width=cui.FILL, height=cui.FILL):
        cui.Label(id="title", text="CoshUI Test")
align and justify parameters to put it to the center like this:
with cui.CoshUIRenderer(backend):
    with cui.Container(id="root_container", width=cui.FILL, height=cui.FILL, align=cui.ALIGN_CENTER, justify=cui.JUSTIFY_CENTER):
        cui.Label(id="title", text="CoshUI Test")
Label() in a container so we can set the direction to COLUMN instead of ROW:
with cui.CoshUIRenderer(backend):
    with cui.Container(id="root_container", width=cui.FILL, height=cui.FILL, align=cui.ALIGN_CENTER, justify=cui.JUSTIFY_CENTER):
        with cui.Container(id="menu_container", direction=cui.COLUMN, align=cui.ALIGN_CENTER, justify=cui.JUSTIFY_CENTER):
            cui.Label(id="title", text="CoshUI Test")
            cui.Button(id="start_btn", text="Start")
            cui.Button(id="quit_btn", text="Quit")

If the image loaded properly, that's how your menu screen should look like. You might think: "This doesn't really look that good...", but that's okay, these are the default values. CoshUI supports styling overrides for the default styling. So lets start that:
with cui.CoshUIRenderer(backend):
    with cui.Container(id="root_container", width=cui.FILL, height=cui.FILL, align=cui.ALIGN_CENTER, justify=cui.JUSTIFY_CENTER):
        with cui.Container(id="menu_container", direction=cui.COLUMN, align=cui.ALIGN_CENTER, justify=cui.JUSTIFY_CENTER, gap=10):
            cui.Label(id="title", text="CoshUI Test", font_size=56)
            cui.Button(id="start_btn", text="Start")
            cui.Button(id="quit_btn", text="Quit")
cui.add_class(
    "menu_buttons",
    cui.CoshStyling(background_color=(220, 165, 255), border=None, border_radius=(10, 0, 10, 0))
)
with cui.CoshUIRenderer(backend):
    with cui.Container(id="root_container", width=cui.FILL, height=cui.FILL, align=cui.ALIGN_CENTER, justify=cui.JUSTIFY_CENTER):
        with cui.Container(id="menu_container", direction=cui.COLUMN, align=cui.ALIGN_CENTER, justify=cui.JUSTIFY_CENTER, gap=10):
            cui.Label(id="title", text="CoshUI Test", font_size=56)
            cui.Button(id="start_btn", text="Start", classes="menu_buttons")
            cui.Button(id="quit_btn", text="Quit", classes="menu_buttons")
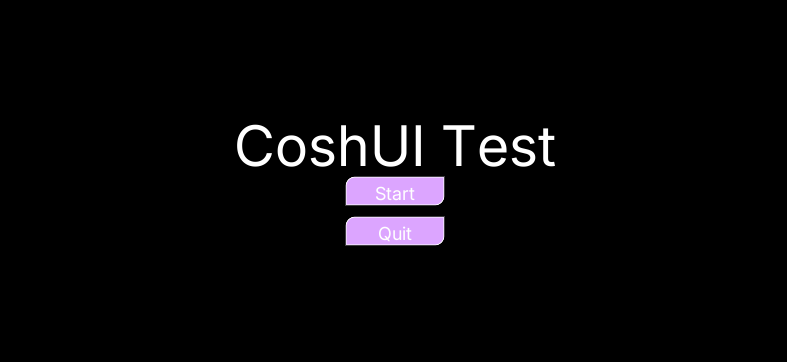
Now lets add some interaction such as making it so when you click the "Quit" button it closes the window:
with cui.CoshUIRenderer(backend):
    with cui.Container(id="root_container", width=cui.FILL, height=cui.FILL, align=cui.ALIGN_CENTER, justify=cui.JUSTIFY_CENTER):
        with cui.Container(id="menu_container", direction=cui.COLUMN, align=cui.ALIGN_CENTER, justify=cui.JUSTIFY_CENTER, gap=10):
            cui.Label(id="title", text="CoshUI Test", font_size=56)
            cui.Button(id="start_btn", text="Start", classes="menu_buttons")
            cui.Button(id="quit_btn", text="Quit", classes="menu_buttons")

if cui.get_signal("quit_btn", cui.CLICKED):
    break
With that, the quit button should be fully functional. Before this tutorial ends though, let's add some functionality to our "Start" button, something simple like a fade out effect with CoshUI's animation system:
with cui.CoshUIRenderer(backend):
    with cui.Container(id="root_container", width=cui.FILL, height=cui.FILL, align=cui.ALIGN_CENTER, justify=cui.JUSTIFY_CENTER):
        with cui.Container(id="menu_container", direction=cui.COLUMN, align=cui.ALIGN_CENTER, justify=cui.JUSTIFY_CENTER, gap=10):
            cui.Label(id="title", text="CoshUI Test", font_size=56)
            cui.Button(id="start_btn", text="Start", classes="menu_buttons")
            cui.Button(id="quit_btn", text="Quit", classes="menu_buttons")

if cui.get_signal("start_btn", cui.CLICKED):
    cui.animate("alpha", "menu_container", 0, 1.5, "linear")
if cui.get_signal("quit_btn", cui.CLICKED):
    break
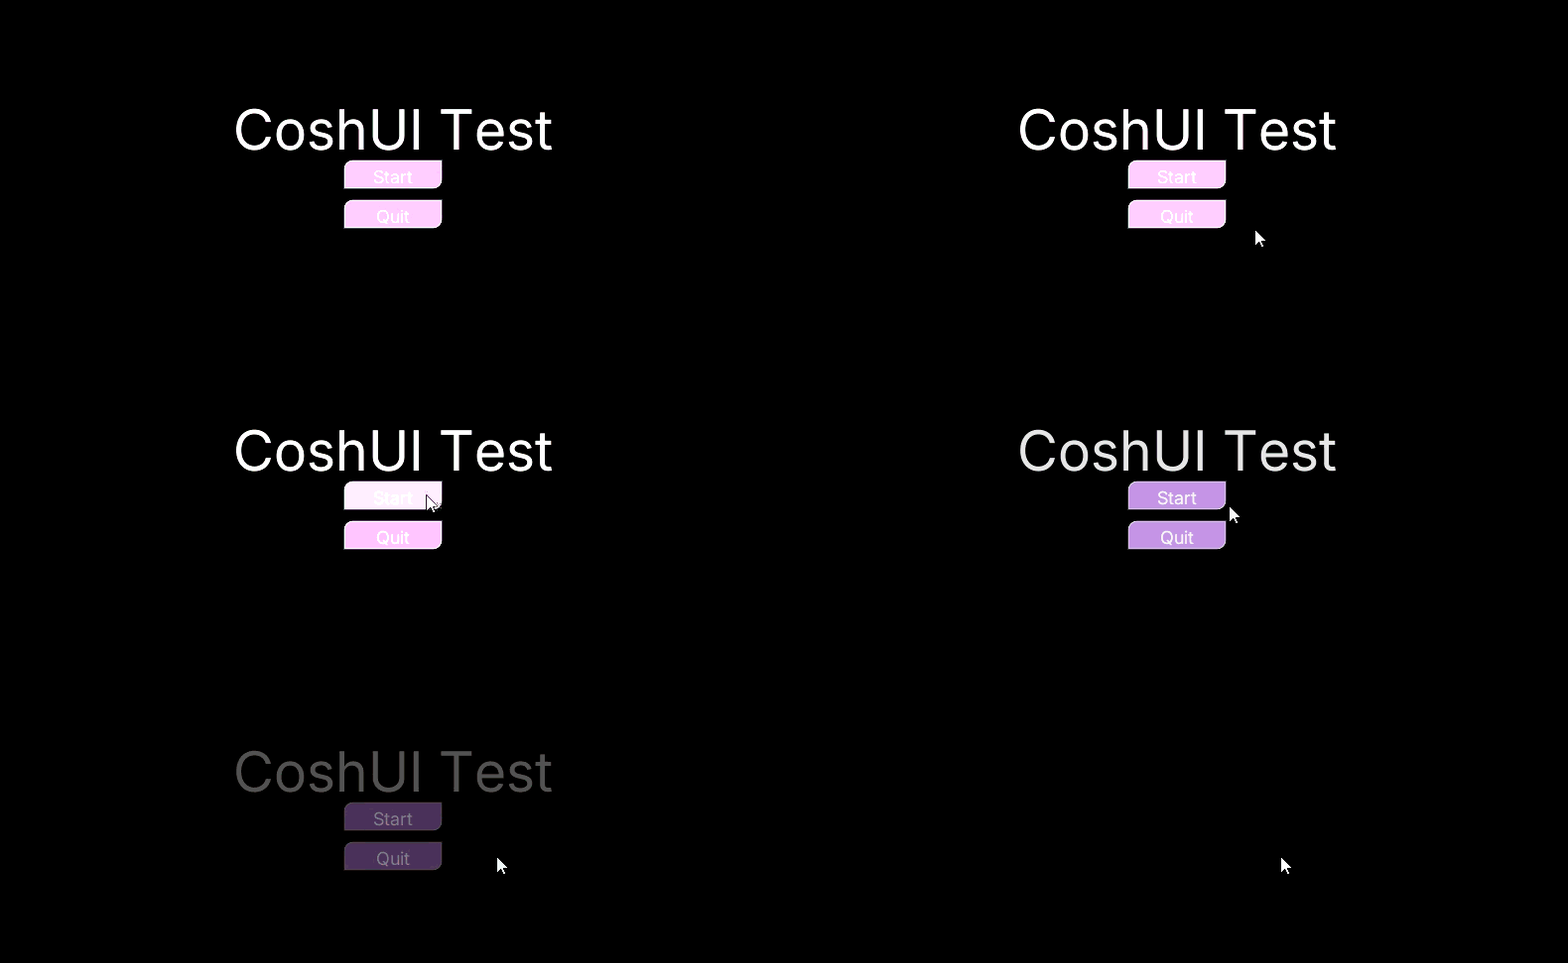
Now you might worry about the UI still being rendered when alpha is set to 0 but you don't need to as Elements get skipped when alpha is set to 0 or if background_color has no value, so your frame budget will be less than what's necessarily there.
Final Remarks
And with that, that should give you the basic understanding of how to use CoshUI. This tutorial can't cover everything like image rendering or other widgets such as Grid, Modal, Slider, and more. So if you want to dive even deeper and create cooler things with CoshUI, you can head on over to the Learn The API section for more.
And of course, here's the final code file we worked on:
import glfw
from OpenGL.GL import *
import coshui as cui

def main():
    if not glfw.init(): return

    window = glfw.create_window(800, 800, "PyOpenGL::GLFW CoshUI Test", None, None)
    if not window:
        glfw.terminate()
        return

    glfw.make_context_current(window)

    glClearColor(0.0, 0.0, 0.0, 1.0)

    backend = cui.PyOpenGLBackend(cui.GLFW)

    cui.add_class(
        "menu_buttons",
        cui.CoshStyling(background_color=(220, 165, 255), border=None, border_radius=(10, 0, 10, 0))
    )

    while not glfw.window_should_close(window):
        glClear(GL_COLOR_BUFFER_BIT | GL_DEPTH_BUFFER_BIT)

        with cui.CoshUIRenderer(backend):
            with cui.Container(id="root_container", width=cui.FILL, height=cui.FILL, align=cui.ALIGN_CENTER, justify=cui.JUSTIFY_CENTER):
                with cui.Container(id="menu_container", direction=cui.COLUMN, align=cui.ALIGN_CENTER, justify=cui.JUSTIFY_CENTER, gap=10):
                    cui.Label(id="title", text="CoshUI Test", font_size=56)
                    cui.Button(id="start_btn", text="Start", classes="menu_buttons")
                    cui.Button(id="quit_btn", text="Quit", classes="menu_buttons")

        if cui.get_signal("start_btn", cui.CLICKED):
            cui.animate("alpha", "menu_container", 0, 1.5, "linear")
        if cui.get_signal("quit_btn", cui.CLICKED):
            break

        glfw.swap_buffers(window)
        glfw.poll_events()

    glfw.terminate()

if __name__ == "__main__":
    main()
Prerequisites
Python v3.10+coshuipackagemoderngldependency
If you haven't met these requirements, please go here.
Basic Boilerplate
To start us off, let's make the ModernGL with GLFW boilerplate that we'll use for this tutorial. If you're following along, make sure to copy this boilerplate into your file.
Do note that all UI related code that we will be working on will be within the highlighted line.
import moderngl
import glfw
import coshui as cui

def main():
    if not glfw.init(): return

    window = glfw.create_window(800, 800, "ModernGL::GLFW CoshUI Test", None, None)
    if not window:
        glfw.terminate()
        return

    glfw.make_context_current(window)

    ctx = moderngl.create_context()

    while not glfw.window_should_close(window):
        ctx.clear(0.0, 0.0, 0.0, 1.0)

        # CoshUI Code Here

        glfw.swap_buffers(window)
        glfw.poll_events()

    glfw.terminate()

if __name__ == "__main__":
    main()
Setting Up CoshUIRenderer
Let us move on to the "body" of CoshUI. CoshUIRenderer() is the "entry point" of the CoshUI engine, UI syntax will not work properly without it. To set it up for ModernGL, you must do this:
# Before the while loop
backend = cui.ModernGLBackend(ctx, cui.GLFW)

while not glfw.window_should_close(window):
    ...
Highlight in Boilerplate
Remember to put this code within the highlighted part of the boilerplate.
All UI code runs within this context manager (with block). It registers all CoshUI nodes, determines their order of rendering, and gives you the ability to animate and interact with them for free.
Immediate and Retained Hybrid
A note to keep in mind is that CoshUI is inherently an "immediate mode" UI library, meaning it rebuilds every Node per frame. It gets away with signals and animations because it has an internal reconciliation layer that saves and sets state per frame.
Before we move on, I'd like to discuss the parameters If set to ▸CoshUIRenderer Parameters
CoshUIRenderer() takes. It takes a CoshBackend instance for its first parameter and a CoshMode instance for its second. CoshBackend is easy to deduce, it's the backend that we pass based on what rendering pipeline we're using, but CoshMode might be a little confusing.CoshMode is defaulted to NORMAL, which makes it run normally. But one thing you can do is set it to DEBUG:
DEBUG, it will open up a tkinter window that lets you see the entire UI structure and click individual Nodes to see their properties for that frame (similar to DevTools on a browser). This is helpful for whenever need to check values for each Node.
Declaring Your First Element
Learning new UI libraries can be scared because of the new API you have to learn, but CoshUI is built to be easy to pick up without much resistance when building or migrating the UI. If you have experience with HTML then this might seem very familiar, if you don't then that's completely okay. Let's create our first Container as a Node instead of a Parent. Here's how that works:
with cui.CoshUIRenderer(backend):
    cui.Container(id="root_container", width=100, height=100)
If you've added that to your code and ran it, you might be confused as to why nothing is showing, well no need to worry about that for now, your Container is currently invisible because it has no color. We'll get into styling in the next section.
Back to our example above, that Container instance creates a box that is 100x100 in size on the top-left of the screen. An interesting part about Containers is that they can actually act as context managers that take in children like this:
with cui.CoshUIRenderer(backend):
    with cui.Container(id="root_container", width=100, height=100):
        cui.Container(id="child_container", width=50, height=50)
Container within the root_container that is 50x50 in size.
Node Types
From this, there might be some people thinking CoshUI is all about Containers, but the Container is one of many Nodes/Widgets in CoshUI. We'll get to the others soon.
Styling Your First Element
In other UI libraries, styling is mostly an afterthought. In CoshUI, styling is a primary part of the experience. To style a Node, you need to utilize CoshUI's CoshStyling object. It holds the properties that each Node needs to be visually distinct.
So let's first add a color to our Container. To set it, you can do this:
with cui.CoshUIRenderer(backend):
    cui.Container(
        id="root_container",
        width=100, height=100,
        style=cui.CoshStyling(background_color=(100, 100, 255))
    )
Container at the top-left of your window.
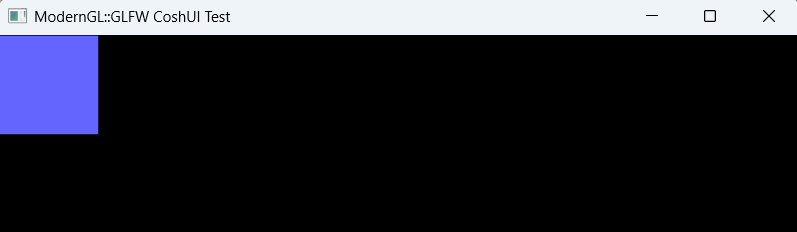
The Background Color is almost a no-brainer. Its main purpose is to declare the color of the Node. It can be set like this: Alpha is also — again — a no-brainer. It determines the transparency of a Node. It can be set like this: You may notice, background color lets you set the alpha within it. Not to worry though, if the Border sets an outline around a Node. It can be set like this: Border radius determines the roundness of a Node's corner. You can either set all corners or each individual corner like this: CoshUI has "transform" properties. Basically properties that only affect rendering, not layout. The first is The next one is The last one is To learn more about styling, check the Styling section in the API. ▸CoshStyling Parameters
CoshStyling object is what determines the visual identity of a Node. It offers a few parameters that let you change the entire look of a Node.Background Color and Alpha
background_color=(R, G, B) or background_color=(R, G, B, A).alpha=0-255.alpha field is set when the alpha value is set in background_color, the alpha field takes priority.Border
border=((R, G, B), weight) or border=(R, G, B, weight)Border Radius
border_radius=20 or border_radius=(top-left, top-right, bottom-right, bottom-left)Transforms
transform_position, which lets you offset the node relative to its position. Basically (0, 50) means it moves 50 pixels downward from its current position. It can be set like this: transform_position=(x, y)transform_scale, which changes the scale of a Node with the default being 1.0. It can be set like this: transform_scale=2.0 which makes the Node 2x bigger relative to its center.transform_rotation, which rotates the Node based counter-clockwise on the passed degree. It can be set like this: transform_rotation=45.0 which tilts the node 45 degrees counter-clockwise.
If you've noticed, styling can be somewhat tedious, especially if it's the same styles applied to multiple Nodes. To make it easier, CoshUI has a class system that you can utilize to apply the same styles to many Nodes without re-declaring the same with that, you can now pass in that style to a Node by passing it through the The cool thing about classes is that you can pass in multiple classes at the same time, so if you declare multiple classes with different styling for each, the Node will take in all of it like this: You can pass multiple classes like this where you just add in a space to the string, but if your class name itself has a space (for some reason), it's better to pass it through a list like this: Class Ordering A question appears with multiple classes, what styles get added if there are conflicting styles? In CoshUI, the classes that are added later in the Example:
If you want to learn more about reusable styling, check out the Classes section in the API.▸Reusable Styling Through Classes
CoshStyling object. To use it you have to declare the class and the CoshStyling object before the main while loop like this:# This is called BEFORE the while loop.
cui.add_class(
"example_class",
cui.CoshStyling(background_color=(255, 100, 100), border_radius=10, border=((255, 255, 255), 5))
)
classes field with the string itself (classes="example_class") or a list (classes=["example_class"]). Here's an example:with cui.CoshUIRenderer(backend):
cui.Container(
id="root_container",
width=100, height=100,
classes="example_class"
)
# Outside the while loop
cui.add_class(
    "example_class",
    cui.CoshStyling(background_color=(255, 100, 100), border_radius=10, border=((255, 255, 255), 5))
)
cui.add_class(
    "example_class2",
    cui.CoshStyling(alpha=150)
)

# in CoshUIRenderer
with cui.CoshUIRenderer(backend):
    cui.Container(
        id="root_container",
        width=100, height=100,
        classes="example_class example_class2"
    )
classes field will override the ones added before. In the example above, if the two classes had conflicting properties, the one added latest will override the ones before. And of course, explicit styling (styles directly added through the style field) takes highest priority.
Layout Fundamentals
Before moving on, let's learn a little bit about the layout properties you can set which gives you maximum control over your UI.
As this is a little much to take on all at once, I've made every part collapsible so it's easier to digest one at a time.
As shown in earlier sections, you can set width and height. These two properties are Universal Properties, meaning they exist and can be set in every Node within CoshUI. They determine the size of your Node based on pixels. Here are the 4 ways to set width and height: To learn more, check out the Width and Height section in the API.▸Width and Height
# Fixed
cui.Container(
    width=100
)
# Fill
cui.Container(
    width=cui.FILL
)
# AUTO
cui.Container(
    width=cui.AUTO
)
# Percentage
cui.Container(
    width=cui.PERCENTAGE(75)
)
Margin is a Universal Property whilst padding is a Local Property and can only be set within To learn more, check out the Padding and Margin section in the API.▸Padding and Margin
ParentNodes (Nodes that can take in children). An example of a ParentNode would be Container. Margin is the property that dictates the space other nodes need to give around that specific Node, while padding dictates the distance the children should be from the edges of that ParentNode. You can set padding and margin like this:
Positioning is a simple toggle in CoshUI. It determines whether a Node will be added to the layout calculations or not. The default is To learn more, check out the Positioning section in the API.▸Positioning
RELATIVE, meaning it will take up space and other Nodes will respect that space, setting it to ABSOLUTE makes it so that Node no longer gets added to layout calculations. Other Nodes will take that Node's space, kind of like it doesn't exist anymore to them. This also opens up the x and y parameters discussed next. Setting positioning is like this:# ABSOLUTE
cui.Container(positioning=cui.ABSOLUTE)
# RELATIVE (This is default so there's no point in setting this)
cui.Container(positioning=cui.RELATIVE)
Position in CoshUI refers to the To learn more, check out the Position section in the API.▸Position
x and y properties, and these are a bit special. It can only be mutated when the positioning parameter is set to ABSOLUTE, if not then adding values to x and y does nothing. What x and y do is directly offsets the position (relative to the parent) of the node layout-wise. To set x and y, you need to first set positioning to ABSOLUTE first, like this:
The As this is a complex topic, it is encouraged to check the Align and Justify section in the API.▸Align and Justify
align and justify properties for CoshUI are Local Properties, they are accessible only through ParentNodes like Container or Grid. They determine the position of that Nodes children within itself. They can be set like this:# Note that these are only accessible through ParentNodes.
cui.Container(align=cui.ALIGN_CENTER, justify=cui.JUSTIFY_CENTER)
# These are the values you can set align and justify to.
align=cui.ALIGN_START
align=cui.ALIGN_CENTER
align=cui.ALIGN_END
justify=cui.JUSTIFY_START
justify=cui.JUSTIFY_CENTER
justify=cui.JUSTIFY_END
justify=cui.JUSTIFY_SPACE_AROUND
justify=cui.JUSTIFY_SPACE_BETWEEN
justify=cui.JUSTIFY_SPACE_EVENLY
The The example above makes it so the children of the ▸Gap
gap property only exists in ParentNodes. It's a simple property, all it does is determine the gap children will have between each other. Here's how to set it:Container will have a gap of 10 pixels between each other.
The You can set it to both ▸Direction
direction property is a property that only the Container widget possesses, it determines whether children will be placed horizontally or vertically. It's default value is ROW and setting it is simple:ROW and COLUMN, but ROW is default so there's no point in setting it unless you want to be explicit.
Introducing Signals
If you've used other UI frameworks, interaction systems usually use callback systems, which can be rather complex and a bit of a mess to set up. In CoshUI however, you can use what's called a "signal". Every Node will emit one, so if a Node is hovered over it will emit a HOVERED signal, if it is clicked it will emit a CLICKED signal. This comes automatically so users only need to poll those signals to check whether an event has happened to a Node or not, which lets you run your code if it has.
Let's declare a Button() — one of CoshUI's many widgets — and see how it works. Let's also make it so the Container's width and height fill the entire screen, here's how that will work:
with cui.CoshUIRenderer(backend):
    with cui.Container(
        id="root_container",
        width=cui.FILL, height=cui.FILL,
        style=cui.CoshStyling(background_color=(100, 100, 255))
    ):
        cui.Button(id="example_button", text="Click to Print")
if statement with the get_signal() function that CoshUI provides:
with cui.CoshUIRenderer(backend):
    with cui.Container(
        id="root_container",
        width=cui.FILL, height=cui.FILL,
        style=cui.CoshStyling(background_color=(100, 100, 255))
    ):
        cui.Button(id="example_button", text="Click to Print")

if cui.get_signal("example_button", cui.CLICKED):
    print("Hello World!")
get_signal() takes in 2 parameters, the id of the Node you want to capture signals from and the event you want to poll. Once you click the button, it will now print Hello World! in the terminal.
A nice thing about the signal system is that it works for every Node, not just buttons. If you want to see if a Container was clicked, you can poll it as long as it has an id. It's also additive, meaning if you make a signal on the same Node, it doesn't override others.
Example:
with cui.CoshUIRenderer(backend):
    cui.Container(
        id="root_container",
        width=cui.FILL, height=cui.FILL,
        style=cui.CoshStyling(background_color=(100, 100, 255))
    )

if cui.get_signal("root_container", cui.CLICKED):
    print("Hello World!")
In CoshUI, there are ways to customize how a Node receives and consumes interaction events. We can achieve that with the The first value you can set Next value is Last value is ▸Mouse Filters
mouse_filter field which is a Universal Property. mouse_filter to is IGNORE:PASS:STOP:
As you may have already guessed, there are quite a few interactions that can be passed in to the signal system. Here's what they are: These can be passed to the second parameter of the ▸Different Interactions
# Checks if the node was just clicked.
cui.CLICKED

# Checks if the node was just released from a click event.
cui.RELEASED

# Checks if the node is being clicked that frame.
cui.PRESSED

# Checks if the cursor entered the Node's boundaries.
cui.HOVER_ENTER

# Checks if the cursor exited the Node's boundaries.
cui.HOVER_EXIT

# Checks if the cursor is within the Node's boundaries.
cui.HOVERED
get_signal() function. To learn more, check the Signals section in the API.
Introducing Animations
When using other UI libraries, I'm willing to bet most of them have little to no built-in animation systems. Some may have external libraries that help with animations but for the most part, animations are either fully missing or not even considered a first-class citizen.
CoshUI is different, it has its own animation system built upon the reconciliation structure. You've most probably seen it work in the previous section as the Button() widget has built-in animations.
So let's address how to animate Nodes. CoshUI has an animate() function that takes in 5 parameters, n_property, target_id, end_value, duration, and finally easing. Here's an example of how it works:
if cui.get_signal("example_button", cui.CLICKED):
    cui.animate("transform_position", "example_button", (0, 50), 1.5, "ease_out_bounce")
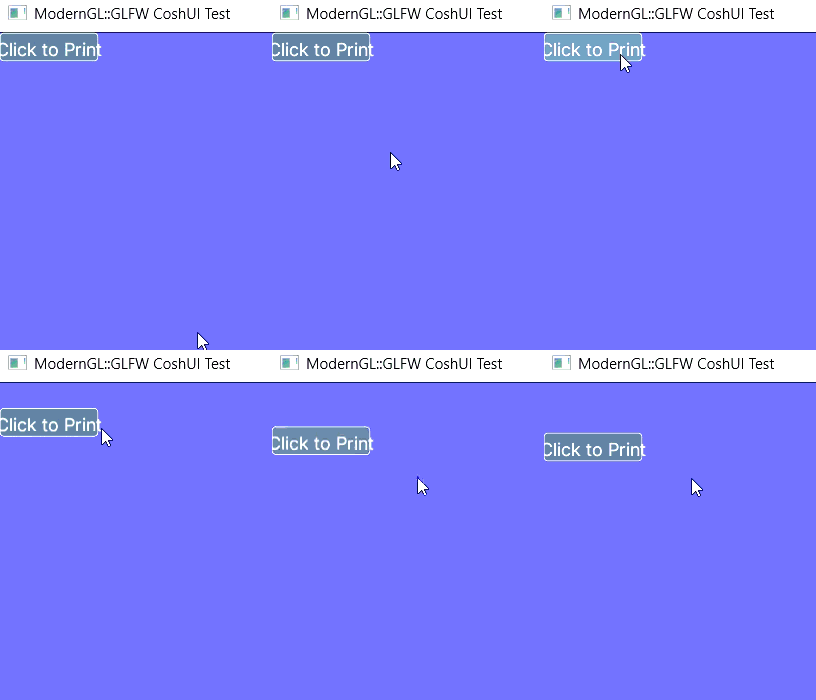
As explained, CoshUI's animation system has many parameters, and some of them aren't very straightforward, especially the Node properties you can animate and the easing curves. Here's a comprehensive list of properties you can pass to CoshUI's When it comes to easing curves, CoshUI's list is quite small currently but should be enough for most use cases. A quick note would be the To learn more about animations, check out the Animation section in the API.▸Properties and Easing Curves
animate() function.
Properties
Description
background_colorSmoothly shifts the Node's background to a new RGB color.
alphaFades the Node in or out by easing its transparency toward the target value.
transform_positionGlides the Node to a new offset position, without affecting layout.
transform_scaleGrows or shrinks the Node toward the target scale, relative to its center.
transform_rotationSpins the Node counter-clockwise toward the target rotation, in degrees.
_in suffix on the easing means the movement is applied at the beginning and the _out suffix means the movement is applied at the end. Here is CoshUI's list:
Easing Curves
Description
linearMoves at a constant speed from start to finish — no acceleration or deceleration.
ease_inStarts slow and speeds up toward the end.
ease_outStarts fast and slows down toward the end.
ease_in_outStarts slow, speeds up in the middle, then slows down again at the end.
ease_in_bounceBounces a few times right at the start before settling into motion.
ease_out_bounceSettles in with a few bounces at the end, like a ball coming to rest.
ease_in_elasticWinds up with a springy overshoot before snapping into motion.
ease_out_elasticOvershoots the target and wobbles back like a spring before settling.
Creating A Menu Screen
Now that we've decently discussed CoshUI's capabilities, let's get on to actually creating something. We'll use the same boilerplate with the same root_container Container as declared but lets get back on track to actually making a basic version of something that you or someone might try making for a game.
with cui.CoshUIRenderer(backend):
    with cui.Container(id="root_container", width=cui.FILL, height=cui.FILL):
        pass
Label() widget acting as our game's title.
with cui.CoshUIRenderer(backend):
    with cui.Container(id="root_container", width=cui.FILL, height=cui.FILL):
        cui.Label(id="title", text="CoshUI Test")
align and justify parameters to put it to the center like this:
with cui.CoshUIRenderer(backend):
    with cui.Container(id="root_container", width=cui.FILL, height=cui.FILL, align=cui.ALIGN_CENTER, justify=cui.JUSTIFY_CENTER):
        cui.Label(id="title", text="CoshUI Test")
Label() in a container so we can set the direction to COLUMN instead of ROW:
with cui.CoshUIRenderer(backend):
    with cui.Container(id="root_container", width=cui.FILL, height=cui.FILL, align=cui.ALIGN_CENTER, justify=cui.JUSTIFY_CENTER):
        with cui.Container(id="menu_container", direction=cui.COLUMN, align=cui.ALIGN_CENTER, justify=cui.JUSTIFY_CENTER):
            cui.Label(id="title", text="CoshUI Test")
            cui.Button(id="start_btn", text="Start")
            cui.Button(id="quit_btn", text="Quit")

If the image loaded properly, that's how your menu screen should look like. You might think: "This doesn't really look that good...", but that's okay, these are the default values. CoshUI supports styling overrides for the default styling. So lets start that:
with cui.CoshUIRenderer(backend):
    with cui.Container(id="root_container", width=cui.FILL, height=cui.FILL, align=cui.ALIGN_CENTER, justify=cui.JUSTIFY_CENTER):
        with cui.Container(id="menu_container", direction=cui.COLUMN, align=cui.ALIGN_CENTER, justify=cui.JUSTIFY_CENTER, gap=10):
            cui.Label(id="title", text="CoshUI Test", font_size=56)
            cui.Button(id="start_btn", text="Start")
            cui.Button(id="quit_btn", text="Quit")
cui.add_class(
    "menu_buttons",
    cui.CoshStyling(background_color=(220, 165, 255), border=None, border_radius=(10, 0, 10, 0))
)
with cui.CoshUIRenderer(backend):
    with cui.Container(id="root_container", width=cui.FILL, height=cui.FILL, align=cui.ALIGN_CENTER, justify=cui.JUSTIFY_CENTER):
        with cui.Container(id="menu_container", direction=cui.COLUMN, align=cui.ALIGN_CENTER, justify=cui.JUSTIFY_CENTER, gap=10):
            cui.Label(id="title", text="CoshUI Test", font_size=56)
            cui.Button(id="start_btn", text="Start", classes="menu_buttons")
            cui.Button(id="quit_btn", text="Quit", classes="menu_buttons")
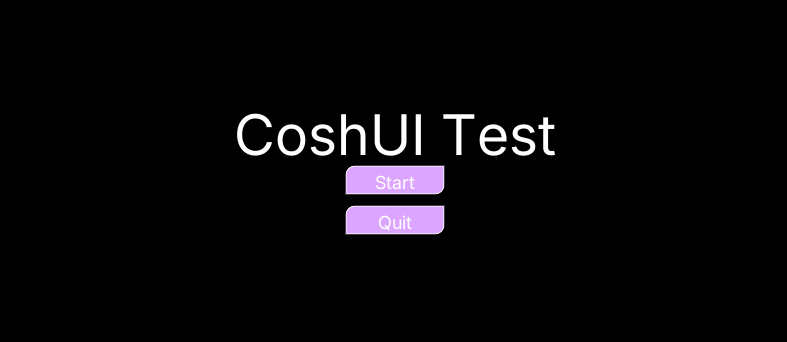
Now lets add some interaction such as making it so when you click the "Quit" button it closes the window:
with cui.CoshUIRenderer(backend):
    with cui.Container(id="root_container", width=cui.FILL, height=cui.FILL, align=cui.ALIGN_CENTER, justify=cui.JUSTIFY_CENTER):
        with cui.Container(id="menu_container", direction=cui.COLUMN, align=cui.ALIGN_CENTER, justify=cui.JUSTIFY_CENTER, gap=10):
            cui.Label(id="title", text="CoshUI Test", font_size=56)
            cui.Button(id="start_btn", text="Start", classes="menu_buttons")
            cui.Button(id="quit_btn", text="Quit", classes="menu_buttons")

if cui.get_signal("quit_btn", cui.CLICKED):
    break
With that, the quit button should be fully functional. Before this tutorial ends though, let's add some functionality to our "Start" button, something simple like a fade out effect with CoshUI's animation system:
with cui.CoshUIRenderer(backend):
    with cui.Container(id="root_container", width=cui.FILL, height=cui.FILL, align=cui.ALIGN_CENTER, justify=cui.JUSTIFY_CENTER):
        with cui.Container(id="menu_container", direction=cui.COLUMN, align=cui.ALIGN_CENTER, justify=cui.JUSTIFY_CENTER, gap=10):
            cui.Label(id="title", text="CoshUI Test", font_size=56)
            cui.Button(id="start_btn", text="Start", classes="menu_buttons")
            cui.Button(id="quit_btn", text="Quit", classes="menu_buttons")

if cui.get_signal("start_btn", cui.CLICKED):
    cui.animate("alpha", "menu_container", 0, 1.5, "linear")
if cui.get_signal("quit_btn", cui.CLICKED):
    break
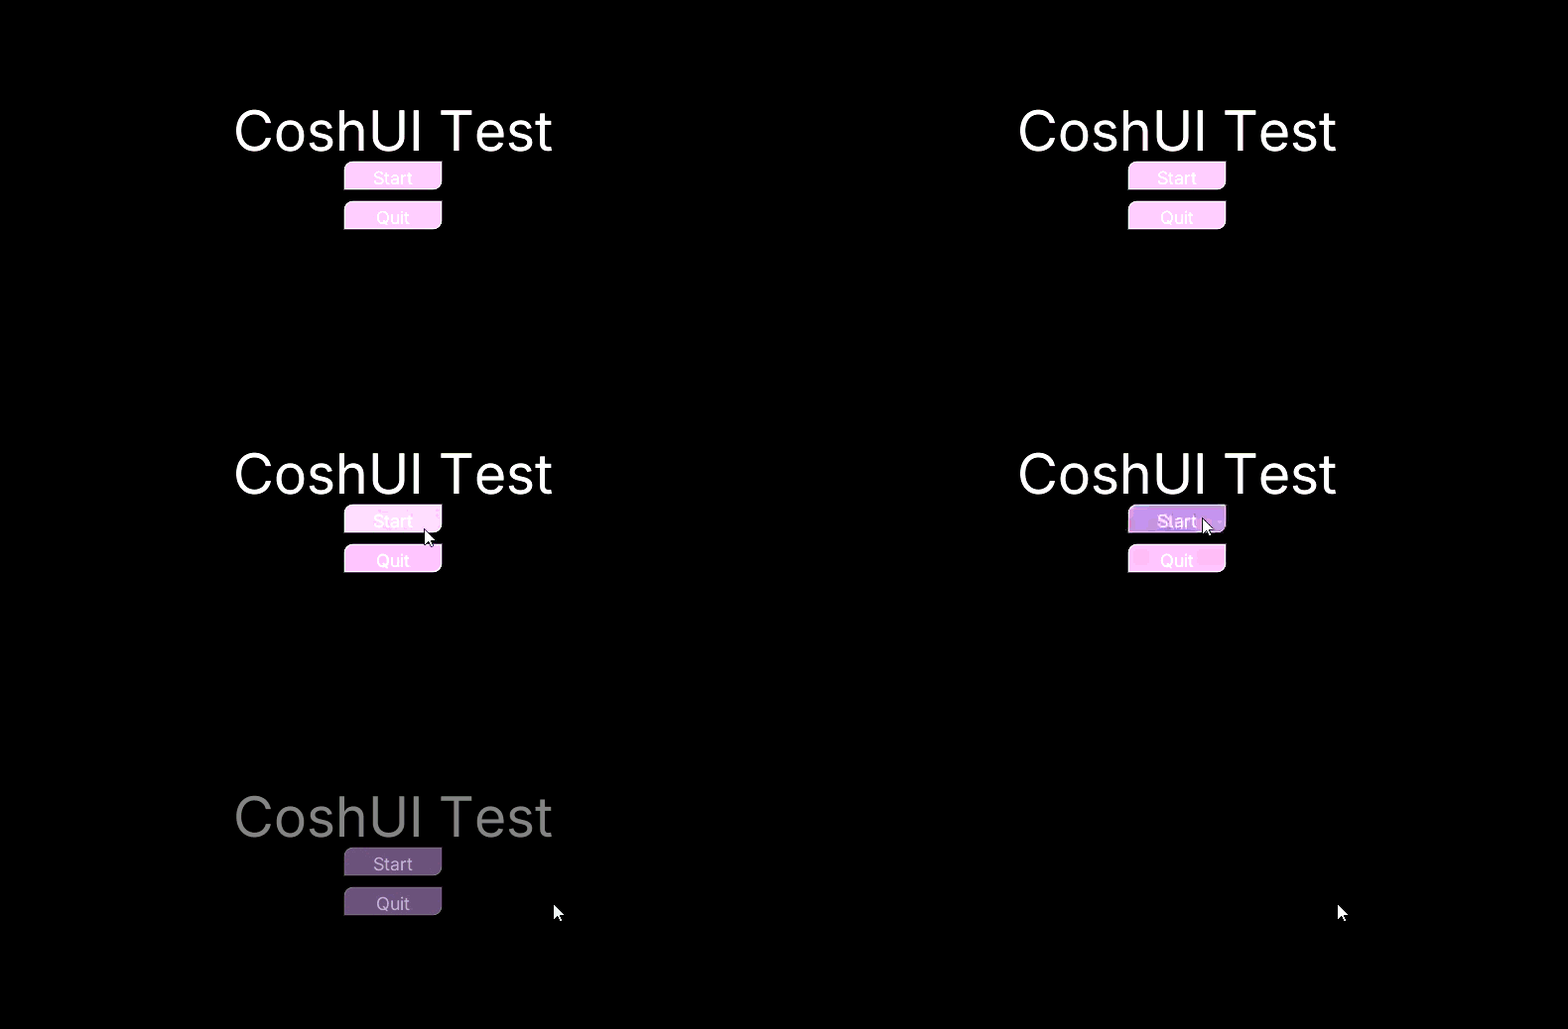
Now you might worry about the UI still being rendered when alpha is set to 0 but you don't need to as Elements get skipped when alpha is set to 0 or if background_color has no value, so your frame budget will be less than what's necessarily there.
Final Remarks
And with that, that should give you the basic understanding of how to use CoshUI. This tutorial can't cover everything like image rendering or other widgets such as Grid, Modal, Slider, and more. So if you want to dive even deeper and create cooler things with CoshUI, you can head on over to the Learn The API section for more.
And of course, here's the final code file we worked on:
import moderngl
import glfw
import coshui as cui

def main():
    if not glfw.init(): return

    window = glfw.create_window(800, 800, "ModernGL::GLFW CoshUI Test", None, None)
    if not window:
        glfw.terminate()
        return

    glfw.make_context_current(window)

    ctx = moderngl.create_context()

    backend = cui.ModernGLBackend(ctx, cui.GLFW)

    cui.add_class(
        "menu_buttons",
        cui.CoshStyling(background_color=(220, 165, 255), border=None, border_radius=(10, 0, 10, 0))
    )

    while not glfw.window_should_close(window):
        ctx.clear(0.0, 0.0, 0.0, 1.0)

        with cui.CoshUIRenderer(backend):
            with cui.Container(id="root_container", width=cui.FILL, height=cui.FILL, align=cui.ALIGN_CENTER, justify=cui.JUSTIFY_CENTER):
                with cui.Container(id="menu_container", direction=cui.COLUMN, align=cui.ALIGN_CENTER, justify=cui.JUSTIFY_CENTER, gap=10):
                    cui.Label(id="title", text="CoshUI Test", font_size=56)
                    cui.Button(id="start_btn", text="Start", classes="menu_buttons")
                    cui.Button(id="quit_btn", text="Quit", classes="menu_buttons")

        if cui.get_signal("start_btn", cui.CLICKED):
            cui.animate("alpha", "menu_container", 0, 1.5, "linear")
        if cui.get_signal("quit_btn", cui.CLICKED):
            break

        glfw.swap_buffers(window)
        glfw.poll_events()

    glfw.terminate()

if __name__ == "__main__":
    main()
Prerequisites
Python v3.10+coshuipackagemoderngldependencymoderngl-windowdependency
If you haven't met these requirements, please go here.
Basic Boilerplate
To start us off, let's make the ModernGL with MGLW boilerplate that we'll use for this tutorial. If you're following along, make sure to copy this boilerplate into your file.
Do note that all UI related code that we will be working on will be within the highlighted line.
ModernGL Window
CoshUI works somewhat weirdly with ModernGL Window. Due to ModernGL Window's architecture being mostly enclosed, developing a work around for using the library has been incredibly tough. CoshUI has to utilize internal functions — as shown in the on_mouse_position_event() method where we set the internal _mouse_pos member variable — just to make the interaction system work. If you're using MGLW, be warned that although it works, CoshUI might have some future issues with the arrangement.
import moderngl_window as mglw
import coshui as cui

class MyRenderer(mglw.WindowConfig):
    gl_version = (3, 3)
    title = "ModernGL::MGLW CoshUI Test"
    window_size = (800, 800)
    aspect_ratio = 16 / 9
    resizable = True

    def __init__(self, **kwargs):
        super().__init__(**kwargs)
        self.mouse_x = 0
        self.mouse_y = 0

    def on_render(self, time: float, frametime: float):
        self.ctx.clear(0.0, 0.0, 0.0)

        # CoshUI Code Here

    def on_resize(self, width: int, height: int):
        self.ctx.viewport = (0, 0, width, height)

    def on_mouse_position_event(self, x, y, dx, dy):
        self.mouse_x = x
        self.mouse_y = y

        # NOTE: This `on_mouse_position_event` method and this _mouse_pos = (x, y) is
        # necessary for CoshUI's interaction system to work.
        mglw.window()._mouse_pos = (x, y)

if __name__ == '__main__':
    mglw.run_window_config(MyRenderer)
Setting Up CoshUIRenderer
Let us move on to the "body" of CoshUI. CoshUIRenderer() is the "entry point" of the CoshUI engine, UI syntax will not work properly without it. To set it up for ModernGL, you must do this:
def __init__(self, **kwargs):
    ...

    self.coshui_backend = cui.ModernGLBackend(self.ctx, cui.MGLW)

    ...
__init__ method so compiling shaders and creation of arrays and buffers are done only once.
Highlight in Boilerplate
Remember to put this code within the highlighted part of the boilerplate.
All UI code runs within this context manager (with block). It registers all CoshUI nodes, determines their order of rendering, and gives you the ability to animate and interact with them for free.
Immediate and Retained Hybrid
A note to keep in mind is that CoshUI is inherently an "immediate mode" UI library, meaning it rebuilds every Node per frame. It gets away with signals and animations because it has an internal reconciliation layer that saves and sets state per frame.
Before we move on, I'd like to discuss the parameters If set to ▸CoshUIRenderer Parameters
CoshUIRenderer() takes. It takes a CoshBackend instance for its first parameter and a CoshMode instance for its second. CoshBackend is easy to deduce, it's the backend that we pass based on what rendering pipeline we're using, but CoshMode might be a little confusing.CoshMode is defaulted to NORMAL, which makes it run normally. But one thing you can do is set it to DEBUG:
DEBUG, it will open up a tkinter window that lets you see the entire UI structure and click individual Nodes to see their properties for that frame (similar to DevTools on a browser). This is helpful for whenever need to check values for each Node.
Declaring Your First Element
Learning new UI libraries can be scared because of the new API you have to learn, but CoshUI is built to be easy to pick up without much resistance when building or migrating the UI. If you have experience with HTML then this might seem very familiar, if you don't then that's completely okay. Let's create our first Container as a Node instead of a Parent. Here's how that works:
with cui.CoshUIRenderer(self.coshui_backend):
    cui.Container(id="root_container", width=100, height=100)
If you've added that to your code and ran it, you might be confused as to why nothing is showing, well no need to worry about that for now, your Container is currently invisible because it has no color. We'll get into styling in the next section.
Back to our example above, that Container instance creates a box that is 100x100 in size on the top-left of the screen. An interesting part about Containers is that they can actually act as context managers that take in children like this:
with cui.CoshUIRenderer(self.coshui_backend):
    with cui.Container(id="root_container", width=100, height=100):
        cui.Container(id="child_container", width=50, height=50)
Container within the root_container that is 50x50 in size.
Node Types
From this, there might be some people thinking CoshUI is all about Containers, but the Container is one of many Nodes/Widgets in CoshUI. We'll get to the others soon.
Styling Your First Element
In other UI libraries, styling is mostly an afterthought. In CoshUI, styling is a primary part of the experience. To style a Node, you need to utilize CoshUI's CoshStyling object. It holds the properties that each Node needs to be visually distinct.
So let's first add a color to our Container. To set it, you can do this:
with cui.CoshUIRenderer(self.coshui_backend):
    cui.Container(
        id="root_container",
        width=100, height=100,
        style=cui.CoshStyling(background_color=(100, 100, 255))
    )
Container at the top-left of your window.
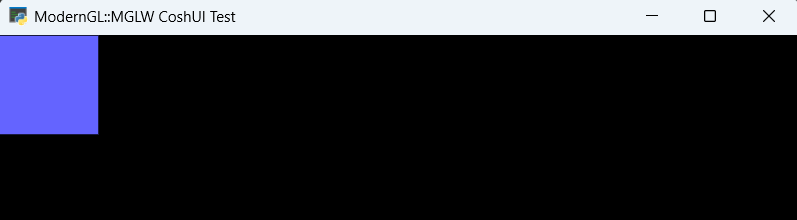
The Background Color is almost a no-brainer. Its main purpose is to declare the color of the Node. It can be set like this: Alpha is also — again — a no-brainer. It determines the transparency of a Node. It can be set like this: You may notice, background color lets you set the alpha within it. Not to worry though, if the Border sets an outline around a Node. It can be set like this: Border radius determines the roundness of a Node's corner. You can either set all corners or each individual corner like this: CoshUI has "transform" properties. Basically properties that only affect rendering, not layout. The first is The next one is The last one is To learn more about styling, check the Styling section in the API. ▸CoshStyling Parameters
CoshStyling object is what determines the visual identity of a Node. It offers a few parameters that let you change the entire look of a Node.Background Color and Alpha
background_color=(R, G, B) or background_color=(R, G, B, A).alpha=0-255.alpha field is set when the alpha value is set in background_color, the alpha field takes priority.Border
border=((R, G, B), weight) or border=(R, G, B, weight)Border Radius
border_radius=20 or border_radius=(top-left, top-right, bottom-right, bottom-left)Transforms
transform_position, which lets you offset the node relative to its position. Basically (0, 50) means it moves 50 pixels downward from its current position. It can be set like this: transform_position=(x, y)transform_scale, which changes the scale of a Node with the default being 1.0. It can be set like this: transform_scale=2.0 which makes the Node 2x bigger relative to its center.transform_rotation, which rotates the Node based counter-clockwise on the passed degree. It can be set like this: transform_rotation=45.0 which tilts the node 45 degrees counter-clockwise.
If you've noticed, styling can be somewhat tedious, especially if it's the same styles applied to multiple Nodes. To make it easier, CoshUI has a class system that you can utilize to apply the same styles to many Nodes without re-declaring the same with that, you can now pass in that style to a Node by passing it through the The cool thing about classes is that you can pass in multiple classes at the same time, so if you declare multiple classes with different styling for each, the Node will take in all of it like this: You can pass multiple classes like this where you just add in a space to the string, but if your class name itself has a space (for some reason), it's better to pass it through a list like this: Class Ordering A question appears with multiple classes, what styles get added if there are conflicting styles? In CoshUI, the classes that are added later in the Example:
If you want to learn more about reusable styling, check out the Classes section in the API.▸Reusable Styling Through Classes
CoshStyling object. To use it you have to declare the class and the CoshStyling object inside the __init__ method like this:# This is called INSIDE the __init__ method.
cui.add_class(
"example_class",
cui.CoshStyling(background_color=(255, 100, 100), border_radius=10, border=((255, 255, 255), 5))
)
classes field with the string itself (classes="example_class") or a list (classes=["example_class"]). Here's an example:with cui.CoshUIRenderer(self.coshui_backend):
cui.Container(
id="root_container",
width=100, height=100,
classes="example_class"
)
# Inside the __init__ method
cui.add_class(
    "example_class",
    cui.CoshStyling(background_color=(255, 100, 100), border_radius=10, border=((255, 255, 255), 5))
)
cui.add_class(
    "example_class2",
    cui.CoshStyling(alpha=150)
)

# in CoshUIRenderer
with cui.CoshUIRenderer(self.coshui_backend):
    cui.Container(
        id="root_container",
        width=100, height=100,
        classes="example_class example_class2"
    )
classes field will override the ones added before. In the example above, if the two classes had conflicting properties, the one added latest will override the ones before. And of course, explicit styling (styles directly added through the style field) takes highest priority.
Layout Fundamentals
Before moving on, let's learn a little bit about the layout properties you can set which gives you maximum control over your UI.
As this is a little much to take on all at once, I've made every part collapsible so it's easier to digest one at a time.
As shown in earlier sections, you can set width and height. These two properties are Universal Properties, meaning they exist and can be set in every Node within CoshUI. They determine the size of your Node based on pixels. Here are the 4 ways to set width and height: To learn more, check out the Width and Height section in the API.▸Width and Height
# Fixed
cui.Container(
    width=100
)
# Fill
cui.Container(
    width=cui.FILL
)
# AUTO
cui.Container(
    width=cui.AUTO
)
# Percentage
cui.Container(
    width=cui.PERCENTAGE(75)
)
Margin is a Universal Property whilst padding is a Local Property and can only be set within To learn more, check out the Padding and Margin section in the API.▸Padding and Margin
ParentNodes (Nodes that can take in children). An example of a ParentNode would be Container. Margin is the property that dictates the space other nodes need to give around that specific Node, while padding dictates the distance the children should be from the edges of that ParentNode. You can set padding and margin like this:
Positioning is a simple toggle in CoshUI. It determines whether a Node will be added to the layout calculations or not. The default is To learn more, check out the Positioning section in the API.▸Positioning
RELATIVE, meaning it will take up space and other Nodes will respect that space, setting it to ABSOLUTE makes it so that Node no longer gets added to layout calculations. Other Nodes will take that Node's space, kind of like it doesn't exist anymore to them. This also opens up the x and y parameters discussed next. Setting positioning is like this:# ABSOLUTE
cui.Container(positioning=cui.ABSOLUTE)
# RELATIVE (This is default so there's no point in setting this)
cui.Container(positioning=cui.RELATIVE)
Position in CoshUI refers to the To learn more, check out the Position section in the API.▸Position
x and y properties, and these are a bit special. It can only be mutated when the positioning parameter is set to ABSOLUTE, if not then adding values to x and y does nothing. What x and y do is directly offsets the position (relative to the parent) of the node layout-wise. To set x and y, you need to first set positioning to ABSOLUTE first, like this:
The As this is a complex topic, it is encouraged to check the Align and Justify section in the API.▸Align and Justify
align and justify properties for CoshUI are Local Properties, they are accessible only through ParentNodes like Container or Grid. They determine the position of that Nodes children within itself. They can be set like this:# Note that these are only accessible through ParentNodes.
cui.Container(align=cui.ALIGN_CENTER, justify=cui.JUSTIFY_CENTER)
# These are the values you can set align and justify to.
align=cui.ALIGN_START
align=cui.ALIGN_CENTER
align=cui.ALIGN_END
justify=cui.JUSTIFY_START
justify=cui.JUSTIFY_CENTER
justify=cui.JUSTIFY_END
justify=cui.JUSTIFY_SPACE_AROUND
justify=cui.JUSTIFY_SPACE_BETWEEN
justify=cui.JUSTIFY_SPACE_EVENLY
The The example above makes it so the children of the ▸Gap
gap property only exists in ParentNodes. It's a simple property, all it does is determine the gap children will have between each other. Here's how to set it:Container will have a gap of 10 pixels between each other.
The You can set it to both ▸Direction
direction property is a property that only the Container widget possesses, it determines whether children will be placed horizontally or vertically. It's default value is ROW and setting it is simple:ROW and COLUMN, but ROW is default so there's no point in setting it unless you want to be explicit.
Introducing Signals
If you've used other UI frameworks, interaction systems usually use callback systems, which can be rather complex and a bit of a mess to set up. In CoshUI however, you can use what's called a "signal". Every Node will emit one, so if a Node is hovered over it will emit a HOVERED signal, if it is clicked it will emit a CLICKED signal. This comes automatically so users only need to poll those signals to check whether an event has happened to a Node or not, which lets you run your code if it has.
Let's declare a Button() — one of CoshUI's many widgets — and see how it works. Let's also make it so the Container's width and height fill the entire screen, here's how that will work:
with cui.CoshUIRenderer(self.coshui_backend):
    with cui.Container(
        id="root_container",
        width=cui.FILL, height=cui.FILL,
        style=cui.CoshStyling(background_color=(100, 100, 255))
    ):
        cui.Button(id="example_button", text="Click to Print")
if statement with the get_signal() function that CoshUI provides:
with cui.CoshUIRenderer(self.coshui_backend):
    with cui.Container(
        id="root_container",
        width=cui.FILL, height=cui.FILL,
        style=cui.CoshStyling(background_color=(100, 100, 255))
    ):
        cui.Button(id="example_button", text="Click to Print")

if cui.get_signal("example_button", cui.CLICKED):
    print("Hello World!")
get_signal() takes in 2 parameters, the id of the Node you want to capture signals from and the event you want to poll. Once you click the button, it will now print Hello World! in the terminal.
A nice thing about the signal system is that it works for every Node, not just buttons. If you want to see if a Container was clicked, you can poll it as long as it has an id. It's also additive, meaning if you make a signal on the same Node, it doesn't override others.
Example:
with cui.CoshUIRenderer(self.coshui_backend):
    cui.Container(
        id="root_container",
        width=cui.FILL, height=cui.FILL,
        style=cui.CoshStyling(background_color=(100, 100, 255))
    )

if cui.get_signal("root_container", cui.CLICKED):
    print("Hello World!")
In CoshUI, there are ways to customize how a Node receives and consumes interaction events. We can achieve that with the The first value you can set Next value is Last value is ▸Mouse Filters
mouse_filter field which is a Universal Property. mouse_filter to is IGNORE:PASS:STOP:
As you may have already guessed, there are quite a few interactions that can be passed in to the signal system. Here's what they are: These can be passed to the second parameter of the ▸Different Interactions
# Checks if the node was just clicked.
cui.CLICKED

# Checks if the node was just released from a click event.
cui.RELEASED

# Checks if the node is being clicked that frame.
cui.PRESSED

# Checks if the cursor entered the Node's boundaries.
cui.HOVER_ENTER

# Checks if the cursor exited the Node's boundaries.
cui.HOVER_EXIT

# Checks if the cursor is within the Node's boundaries.
cui.HOVERED
get_signal() function. To learn more, check the Signals section in the API.
Introducing Animations
When using other UI libraries, I'm willing to bet most of them have little to no built-in animation systems. Some may have external libraries that help with animations but for the most part, animations are either fully missing or not even considered a first-class citizen.
CoshUI is different, it has its own animation system built upon the reconciliation structure. You've most probably seen it work in the previous section as the Button() widget has built-in animations.
So let's address how to animate Nodes. CoshUI has an animate() function that takes in 5 parameters, n_property, target_id, end_value, duration, and finally easing. Here's an example of how it works:
if cui.get_signal("example_button", cui.CLICKED):
    cui.animate("transform_position", "example_button", (0, 50), 1.5, "ease_out_bounce")
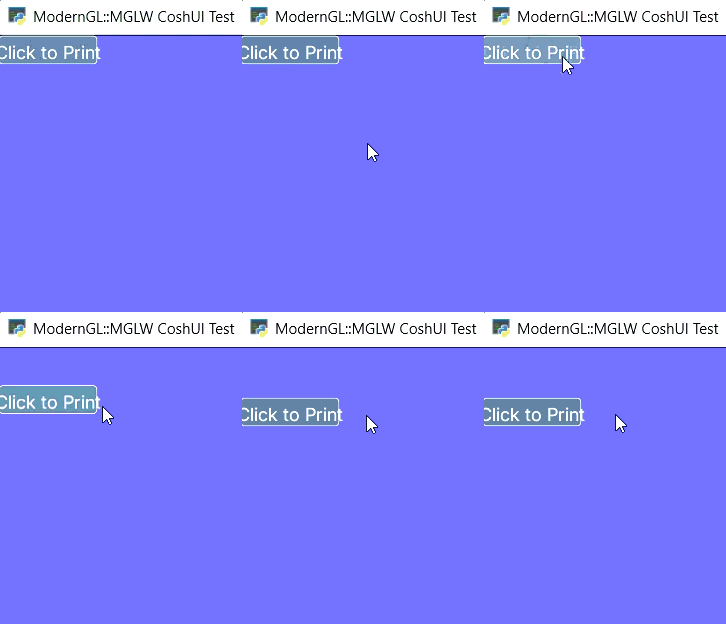
As explained, CoshUI's animation system has many parameters, and some of them aren't very straightforward, especially the Node properties you can animate and the easing curves. Here's a comprehensive list of properties you can pass to CoshUI's When it comes to easing curves, CoshUI's list is quite small currently but should be enough for most use cases. A quick note would be the To learn more about animations, check out the Animation section in the API.▸Properties and Easing Curves
animate() function.
Properties
Description
background_colorSmoothly shifts the Node's background to a new RGB color.
alphaFades the Node in or out by easing its transparency toward the target value.
transform_positionGlides the Node to a new offset position, without affecting layout.
transform_scaleGrows or shrinks the Node toward the target scale, relative to its center.
transform_rotationSpins the Node counter-clockwise toward the target rotation, in degrees.
_in suffix on the easing means the movement is applied at the beginning and the _out suffix means the movement is applied at the end. Here is CoshUI's list:
Easing Curves
Description
linearMoves at a constant speed from start to finish — no acceleration or deceleration.
ease_inStarts slow and speeds up toward the end.
ease_outStarts fast and slows down toward the end.
ease_in_outStarts slow, speeds up in the middle, then slows down again at the end.
ease_in_bounceBounces a few times right at the start before settling into motion.
ease_out_bounceSettles in with a few bounces at the end, like a ball coming to rest.
ease_in_elasticWinds up with a springy overshoot before snapping into motion.
ease_out_elasticOvershoots the target and wobbles back like a spring before settling.
Creating A Menu Screen
Now that we've decently discussed CoshUI's capabilities, let's get on to actually creating something. We'll use the same boilerplate with the same root_container Container as declared but lets get back on track to actually making a basic version of something that you or someone might try making for a game.
with cui.CoshUIRenderer(self.coshui_backend):
    with cui.Container(id="root_container", width=cui.FILL, height=cui.FILL):
        pass
Label() widget acting as our game's title.
with cui.CoshUIRenderer(self.coshui_backend):
    with cui.Container(id="root_container", width=cui.FILL, height=cui.FILL):
        cui.Label(id="title", text="CoshUI Test")
align and justify parameters to put it to the center like this:
with cui.CoshUIRenderer(self.coshui_backend):
    with cui.Container(id="root_container", width=cui.FILL, height=cui.FILL, align=cui.ALIGN_CENTER, justify=cui.JUSTIFY_CENTER):
        cui.Label(id="title", text="CoshUI Test")
Label() in a container so we can set the direction to COLUMN instead of ROW:
with cui.CoshUIRenderer(self.coshui_backend):
    with cui.Container(id="root_container", width=cui.FILL, height=cui.FILL, align=cui.ALIGN_CENTER, justify=cui.JUSTIFY_CENTER):
        with cui.Container(id="menu_container", direction=cui.COLUMN, align=cui.ALIGN_CENTER, justify=cui.JUSTIFY_CENTER):
            cui.Label(id="title", text="CoshUI Test")
            cui.Button(id="start_btn", text="Start")
            cui.Button(id="quit_btn", text="Quit")
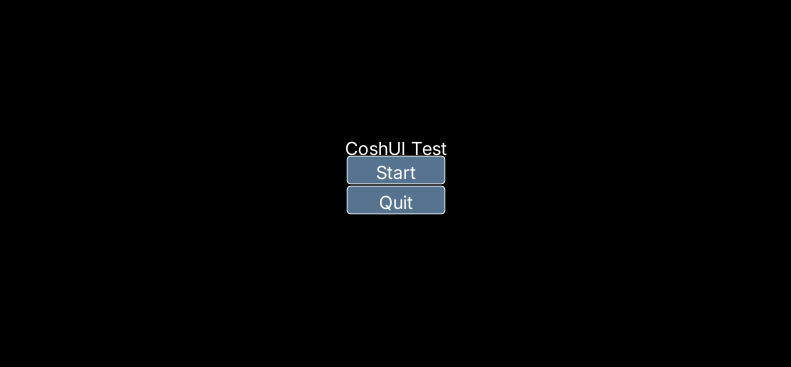
If the image loaded properly, that's how your menu screen should look like. You might think: "This doesn't really look that good...", but that's okay, these are the default values. CoshUI supports styling overrides for the default styling. So lets start that:
with cui.CoshUIRenderer(self.coshui_backend):
    with cui.Container(id="root_container", width=cui.FILL, height=cui.FILL, align=cui.ALIGN_CENTER, justify=cui.JUSTIFY_CENTER):
        with cui.Container(id="menu_container", direction=cui.COLUMN, align=cui.ALIGN_CENTER, justify=cui.JUSTIFY_CENTER, gap=10):
            cui.Label(id="title", text="CoshUI Test", font_size=56)
            cui.Button(id="start_btn", text="Start")
            cui.Button(id="quit_btn", text="Quit")
cui.add_class(
    "menu_buttons",
    cui.CoshStyling(background_color=(220, 165, 255), border=None, border_radius=(10, 0, 10, 0))
)
__init__ method. If you've set up the class, then you can do this to add the custom styling to your buttons:
with cui.CoshUIRenderer(self.coshui_backend):
    with cui.Container(id="root_container", width=cui.FILL, height=cui.FILL, align=cui.ALIGN_CENTER, justify=cui.JUSTIFY_CENTER):
        with cui.Container(id="menu_container", direction=cui.COLUMN, align=cui.ALIGN_CENTER, justify=cui.JUSTIFY_CENTER, gap=10):
            cui.Label(id="title", text="CoshUI Test", font_size=56)
            cui.Button(id="start_btn", text="Start", classes="menu_buttons")
            cui.Button(id="quit_btn", text="Quit", classes="menu_buttons")
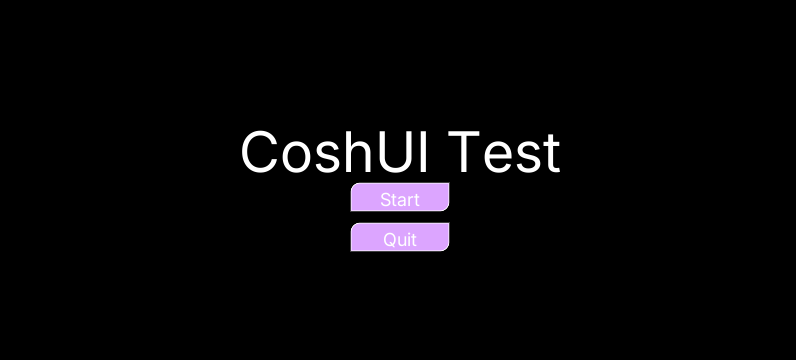
Now lets add some interaction such as making it so when you click the "Quit" button it closes the window:
with cui.CoshUIRenderer(self.coshui_backend):
    with cui.Container(id="root_container", width=cui.FILL, height=cui.FILL, align=cui.ALIGN_CENTER, justify=cui.JUSTIFY_CENTER):
        with cui.Container(id="menu_container", direction=cui.COLUMN, align=cui.ALIGN_CENTER, justify=cui.JUSTIFY_CENTER, gap=10):
            cui.Label(id="title", text="CoshUI Test", font_size=56)
            cui.Button(id="start_btn", text="Start", classes="menu_buttons")
            cui.Button(id="quit_btn", text="Quit", classes="menu_buttons")

if cui.get_signal("quit_btn", cui.CLICKED):
    self.wnd.close()
With that, the quit button should be fully functional. Before this tutorial ends though, let's add some functionality to our "Start" button, something simple like a fade out effect with CoshUI's animation system:
with cui.CoshUIRenderer(self.coshui_backend):
    with cui.Container(id="root_container", width=cui.FILL, height=cui.FILL, align=cui.ALIGN_CENTER, justify=cui.JUSTIFY_CENTER):
        with cui.Container(id="menu_container", direction=cui.COLUMN, align=cui.ALIGN_CENTER, justify=cui.JUSTIFY_CENTER, gap=10):
            cui.Label(id="title", text="CoshUI Test", font_size=56)
            cui.Button(id="start_btn", text="Start", classes="menu_buttons")
            cui.Button(id="quit_btn", text="Quit", classes="menu_buttons")

if cui.get_signal("start_btn", cui.CLICKED):
    cui.animate("alpha", "menu_container", 0, 1.5, "linear")
if cui.get_signal("quit_btn", cui.CLICKED):
    self.wnd.close()
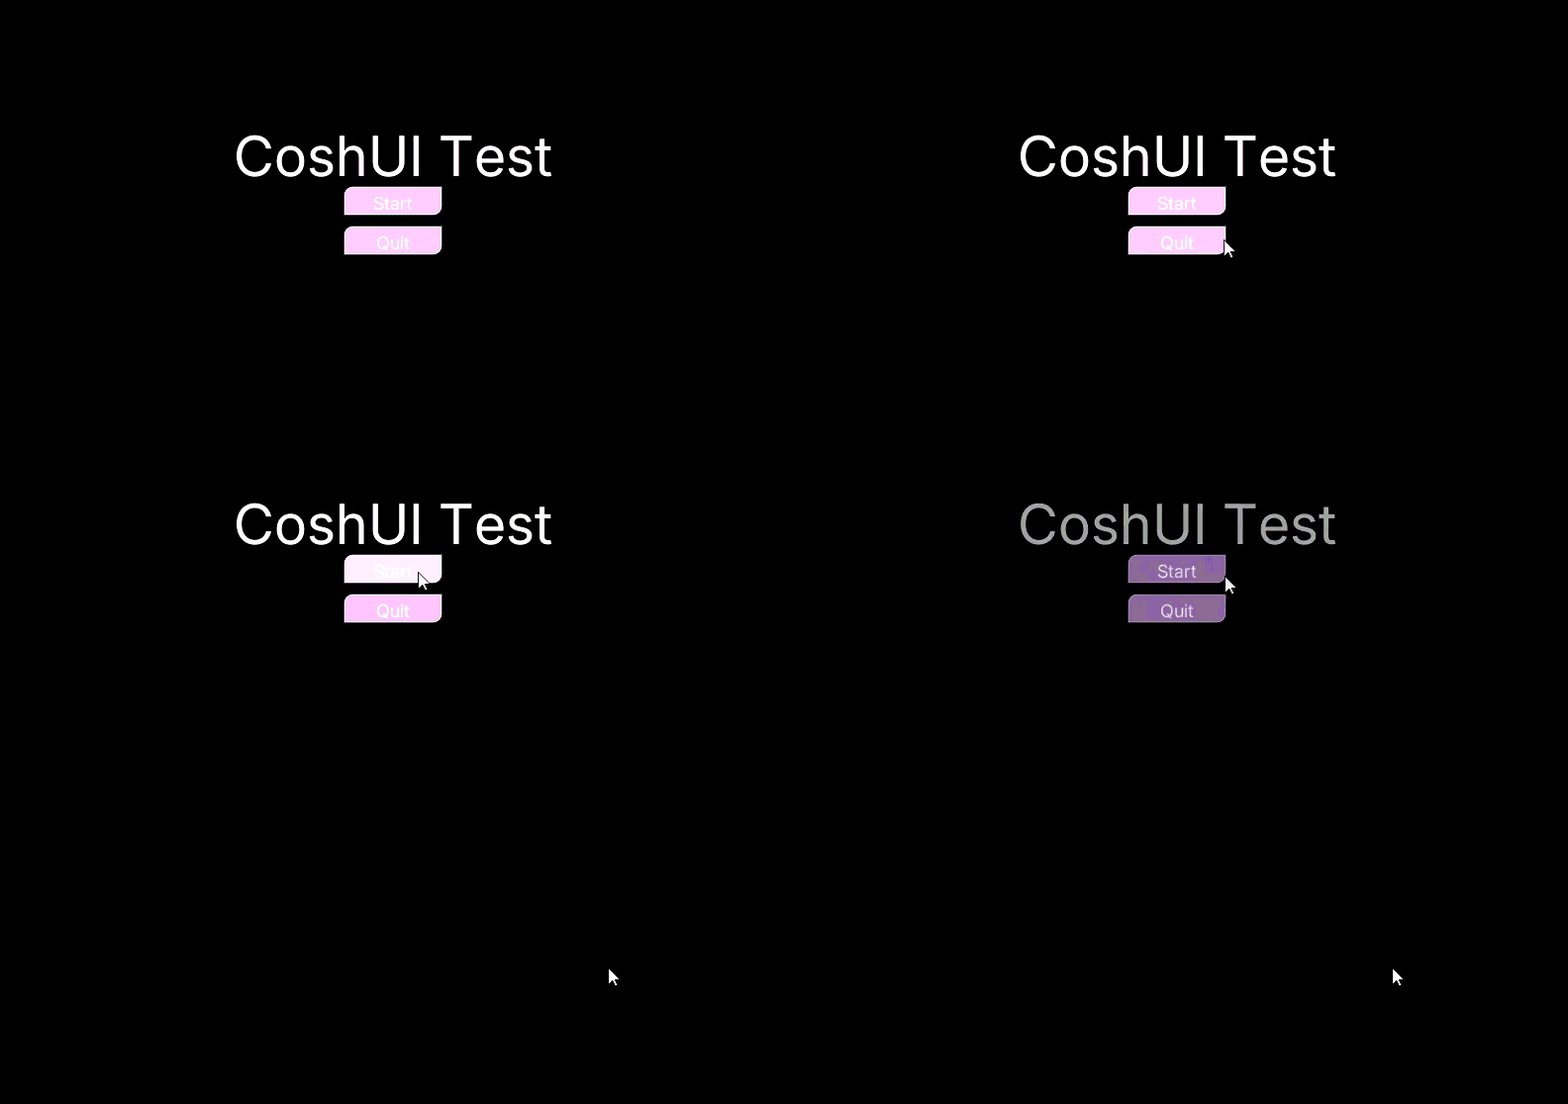
Now you might worry about the UI still being rendered when alpha is set to 0 but you don't need to as Elements get skipped when alpha is set to 0 or if background_color has no value, so your frame budget will be less than what's necessarily there.
Final Remarks
And with that, that should give you the basic understanding of how to use CoshUI. This tutorial can't cover everything like image rendering or other widgets such as Grid, Modal, Slider, and more. So if you want to dive even deeper and create cooler things with CoshUI, you can head on over to the Learn The API section for more.
And of course, here's the final code file we worked on:
import moderngl_window as mglw
import coshui as cui

class MyRenderer(mglw.WindowConfig):
    gl_version = (3, 3)
    title = "ModernGL::MGLW CoshUI Test"
    window_size = (800, 800)
    aspect_ratio = 16 / 9
    resizable = True

    def __init__(self, **kwargs):
        super().__init__(**kwargs)
        self.mouse_x = 0
        self.mouse_y = 0
        self.coshui_backend = cui.ModernGLBackend(self.ctx, cui.MGLW)

        cui.add_class(
            "menu_buttons",
            cui.CoshStyling(background_color=(220, 165, 255), border=None, border_radius=(10, 0, 10, 0))
        )

    def on_render(self, time: float, frametime: float):
        self.ctx.clear(0.0, 0.0, 0.0)

        with cui.CoshUIRenderer(self.coshui_backend):
            with cui.Container(id="root_container", width=cui.FILL, height=cui.FILL, align=cui.ALIGN_CENTER, justify=cui.JUSTIFY_CENTER):
                with cui.Container(id="menu_container", direction=cui.COLUMN, align=cui.ALIGN_CENTER, justify=cui.JUSTIFY_CENTER, gap=10):
                    cui.Label(id="title", text="CoshUI Test", font_size=56)
                    cui.Button(id="start_btn", text="Start", classes="menu_buttons")
                    cui.Button(id="quit_btn", text="Quit", classes="menu_buttons")

        if cui.get_signal("start_btn", cui.CLICKED):
            cui.animate("alpha", "menu_container", 0, 1.5, "linear")
        if cui.get_signal("quit_btn", cui.CLICKED):
            self.wnd.close()

    def on_resize(self, width: int, height: int):
        self.ctx.viewport = (0, 0, width, height)

    def on_mouse_position_event(self, x, y, dx, dy):
        self.mouse_x = x
        self.mouse_y = y

        # NOTE: This `on_mouse_position_event` method and this _mouse_pos = (x, y) is
        # necessary for CoshUI's interaction system to work.
        mglw.window()._mouse_pos = (x, y)

if __name__ == '__main__':
    mglw.run_window_config(MyRenderer)